
0
Owner's of the Brother Sewing Machine PC-420PRW gave it a score of 0 out of 5. Here's how the scores stacked up:
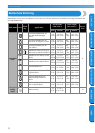


UTILITY STITCHES —————————————————————————————————————————————————
—
86
GETTING READYCONTENTS SEWING BASICS UTILITY STITCHES APPENDIX INDEX
6
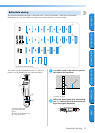
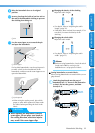
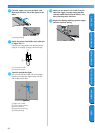
Select stitch
3
.
• For details, refer to “Selecting stitching”
(page 68).
7
Topstitch around the zipper.
1 Stitching
2 Right side of fabric
3 Basting stitching
4 End of zipper opening
8
Remove the basting stitching.
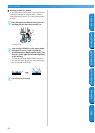
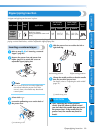
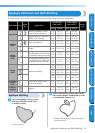
Inserting a side zipper
Stitching is sewn on only one piece of fabric. Use
this type of zipper for side openings and back
openings.
1 Stitching
2 Right side of fabric
3 End of zipper opening
The following procedure will describe how to stitch
on the left side, as shown in the illustration.
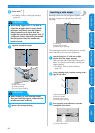
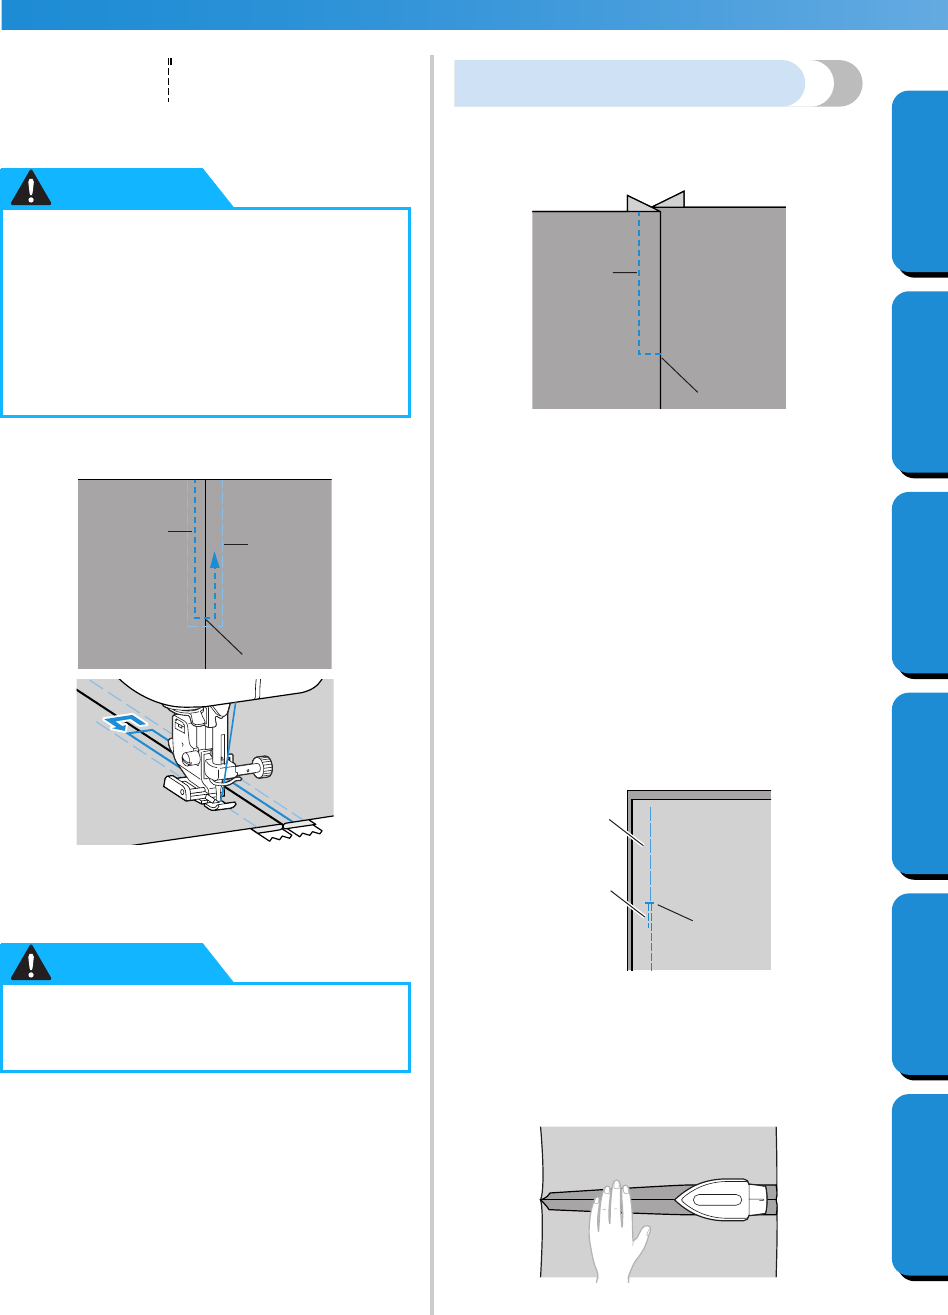
1
Attach zigzag foot “J” and sew straight
stitches up to the zipper opening.
With the right sides of the fabric facing each
other, sew reverse stitches after reaching the
zipper opening.
• For details, refer to “Basic Stitching”
(page 74).
2
Using a basting stitch, continue sewing to the
edge of the fabric.
1 Basting stitching
2 Reverse stitches
3 Wrong side of fabric
4 End of zipper opening
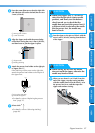
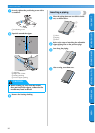
3
Press open the seam allowance from the
wrong side of the fabric.
1 Wrong side of fabric
●
When using zipper foot “I”, be sure to
select the straight stitch (center needle
position), and slowly turn the balance
wheel toward you to check that the
needle does not touch the presser foot. If
a different stitch is selected or the needle
hits the presser foot, the needle may
bend or break.
●
When sewing, be sure that the needle
does not touch the zipper, otherwise the
needle may bend or break.
CAUTION
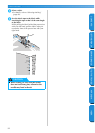
1
3
2
4
CAUTION
1
3
2
1
2
4
3
1


Find Your Products By Category
- Lawn and Garden
- Computer Equipment
- TV and Video
- Laundry Appliance
- Kitchen Appliance
- Car Audio and Video
- Automotive
- Photography
- Fitness & Sports
- Personal Care
- Communications
- Home Audio
- Portable Media
- Musical Instruments & Equipment
- Baby
- Household Appliance
- Cell Phone
- Marine Equipment
- Outdoor Cooking
- Power Tools
- Video Game
Please Login
