
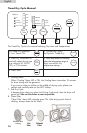
5.0
Owner's of the Haier Clothes Dryer Haier Clothes Dryer gave it a score of 5.0 out of 5. Here's how the scores stacked up:
English
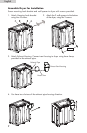
SET UP INSTRUCTIONS
6
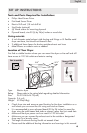
Tools and Parts Required for Installation:
Philips Head Screw Driver•
Flat Head Screw Driver•
Electric Drill and 1/8 inch drill bit•
Stud finder (optional)•
(6) Wood screws for mounting plywood•
Plywood board; size 30 (h) by 24(w) inches or wood slats•
Venting materials:
4 inch diameter metal exhaust rigid ducting and fittings or UL flexible metal •
dryer vent hose, that should not exceed 6 feet.
2 additional hose clamps for ducting outside exhaust vent hose•
Metal Elbows or outdoor vents as needed.•
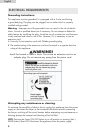
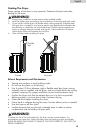
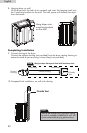
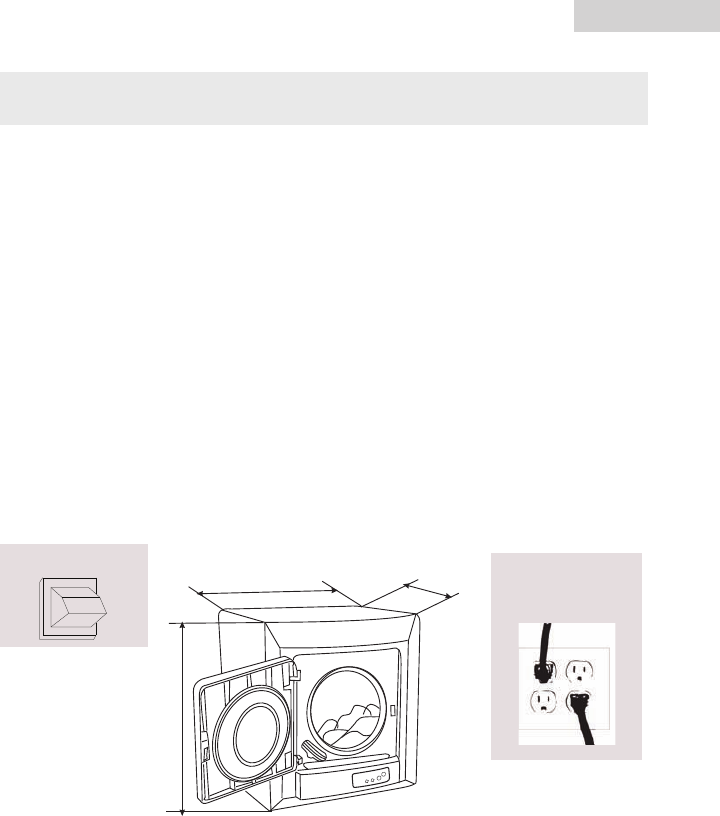
Location of Your Dryer
First find a suitable location where you can mount the dryer on the wall and still
have access to 120 Volt outlets and exterior venting.
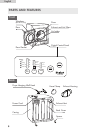
Type: Electric dryer
Rating: Please refer to the rating label regarding detailed information
Size: 26.97x24.8x16.73(inch)
Capacity: 2.6 cu.ft.
Weight: 52.9lbs(24kg)
Check dryer size and ensure a good location for the dryer installation on a •
wall where you can mount the unit using wall studs or beams.
It is recommended to use a plywood board (30 by 24 inches) to mount the •
dryer using the walls beams and studs as support, rather than just wood slats.
Make sure the dryer power cord can reach a 120 Volt outlet.•
Make sure you can connect the exhaust vent to the outside or designated •
dryer vent (in a laundry room).
The length of exhaust ducting should not exceed 6 feet.•
Please read the additional ducting information and warnings in this manual.•
16.73”
26.97
”
24.8”
Vent to outside
Nearest 120 Volt
AC outlet


Find Your Products By Category
- Lawn and Garden
- Computer Equipment
- TV and Video
- Laundry Appliance
- Kitchen Appliance
- Car Audio and Video
- Automotive
- Photography
- Fitness & Sports
- Personal Care
- Communications
- Home Audio
- Portable Media
- Musical Instruments & Equipment
- Baby
- Household Appliance
- Cell Phone
- Marine Equipment
- Outdoor Cooking
- Power Tools
- Video Game
Please Login
