

0
Owner's of the Razor Bicycle Accessories Razor Bicycle Accessories gave it a score of 0 out of 5. Here's how the scores stacked up:

37-44
mm
37-44
mm
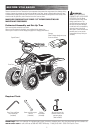
BEFORE RIDING
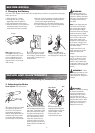
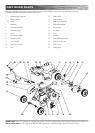
q Charging the Battery
Your electric four wheeler may not have a fully charged battery; therefore it is a good idea to charge the
battery prior to use.
2 Turn power OFF before
charging. Plug the charger into
the charger port to charge unit.
1 Plug the charger into a wall
outlet. If the lights on charger
do not light up, check the power
to the outlet. If necessary, try a
different outlet.
WARNING:
Rechargeable batteries are
only to be charged under adult
supervision. Always disconnect
your electric four wheeler from
the charger before cleaning
with liquid.
Note: If your charger does not
look like the one illustrated,
your unit has been supplied
with an alternative charger.
The specifications and charging
procedure would not change.
The charger has a small window
with one LED to indicate the
charge status. Refer to the
illustration on the charger unit
for the actual “charging” and
“charged” status indications for
your model charger.
Chargers have built-in over-
charge protection to prevent
battery from being over-
charged.
Charger will get warm during
use. This is normal for some
chargers and is no cause for
concern. If your charger does
not get warm during use, it does
not mean that it is not working
properly.
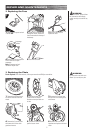
WARNING:
The brake is capable of causing
the electric four wheeler
to skid the tire throwing an
unsuspecting rider. Practice
in an open area free from
obstacles until you are familiar
with the brake function. Avoid
skidding to a stop as this can
cause you to lose control or
damage the rear tire(s).
4
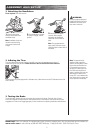
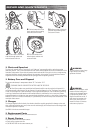
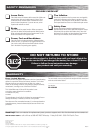
REPAIR AND MAINTENANCE
Turn power switch OFF before conducting any maintenance procedures.
1 To adjust the tension, thread
the brake lever adjuster in or
out 1/4 to 1/2 turn until the
desired brake adjustment is
attained. Most adjustments are
complete at this step. If brake
still needs further adjustment,
proceed to step 2 for rear brake.
2 Locate the rear brake caliper
and disk brake behind the right
rear wheel. The distance of the
brake wire between the end of
the cable and the anchor bolt
should be between 37 and 44
mm. If the rear brake has too
much slack, loosen the rear
anchor bolt with a 5mm Allen
wrench and pull the brake wire
tighter (direction indicated with
arrow).
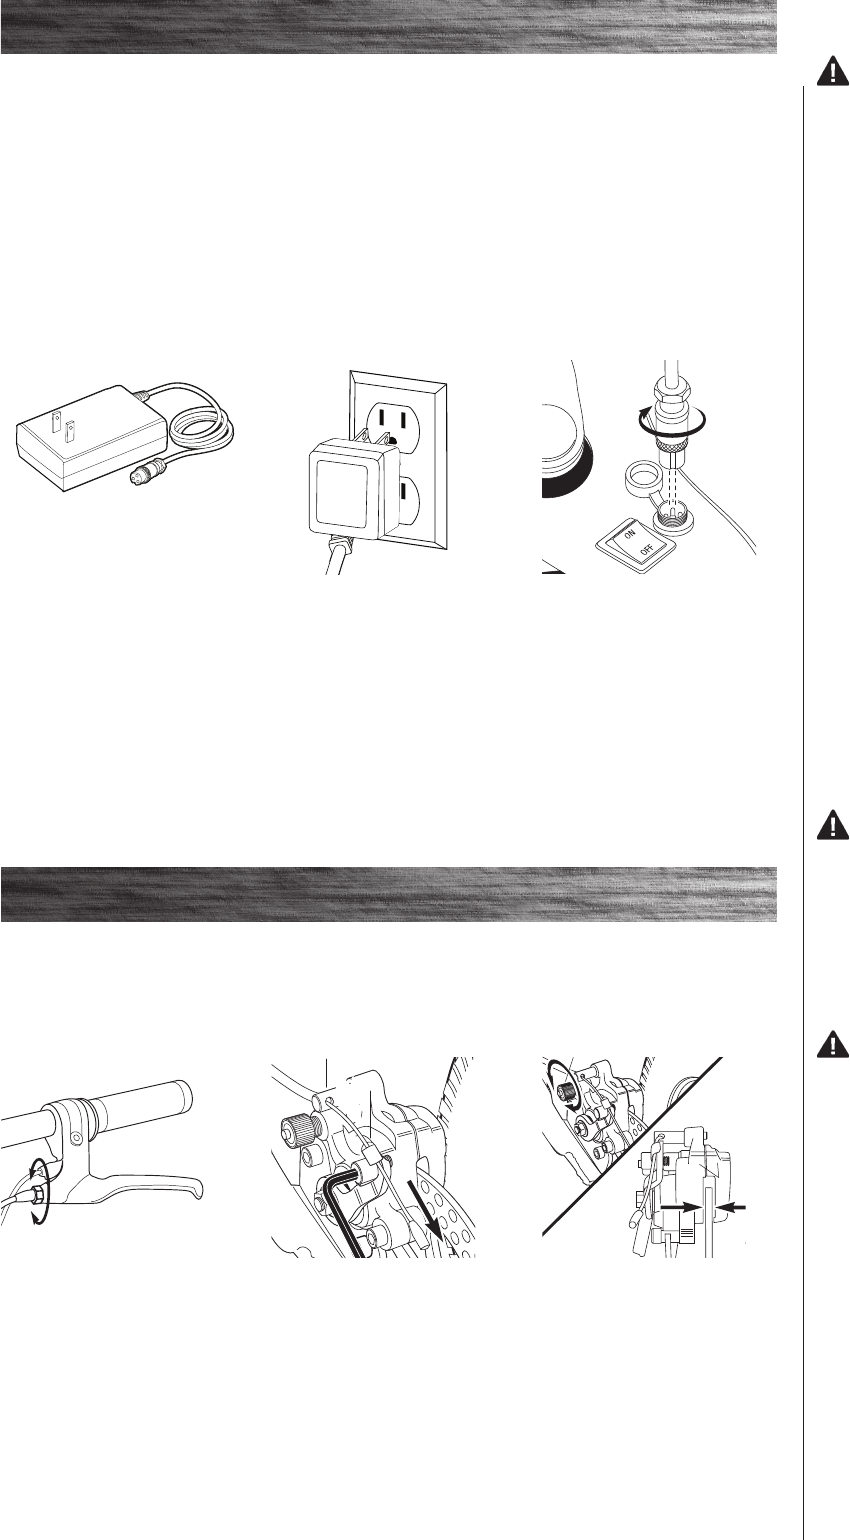
3 If the brake rotor is
dragging on the brake pads
use your fingers to twist the
caliper adjuster in either
direction until rotor is
centered between pads.
Backside
view of
disk brake
Rotor
Pads
Caliper adjuster
q Adjusting the Brake
Tools required: 5mm Allen wrench
WARNING: Failure
to recharge the battery at least
once a month may result in a
battery that will no longer hold
a charge.
Note: Make sure power is
turned OFF when unit is not in
use. If the power switch is left
on for an extended period of
time, the battery may reach a
stage at which it will no longer
hold a charge.
•Initialchargetime:12hours
•Rechargetime:upto12hours,
depending on level of depletion.
•Fullychargebatterybeforestoring.
•Whenthescooterisnotinregularuse,
recharge the battery at least once a
month until normal use is resumed.
•Runtime:Upto40minutesofcontinuousridetime.
Run time may vary depending on riding conditions,
climate and/or proper maintenance.
•Averagebatterylife:250charge/dischargecycles
•Toensurelongbatterylife,donotstorethebattery
in temperatures above 75° or below -10° F.
Charger


Find Your Products By Category
- Lawn and Garden
- Computer Equipment
- TV and Video
- Laundry Appliance
- Kitchen Appliance
- Car Audio and Video
- Automotive
- Photography
- Fitness & Sports
- Personal Care
- Communications
- Home Audio
- Portable Media
- Musical Instruments & Equipment
- Baby
- Household Appliance
- Cell Phone
- Marine Equipment
- Outdoor Cooking
- Power Tools
- Video Game
Please Login
