
0
Owner's of the Razor Mobility Scooter Razor Mobility Scooter gave it a score of 0 out of 5. Here's how the scores stacked up:

5
REPAIR AND MAINTENANCE
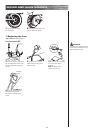
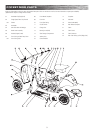
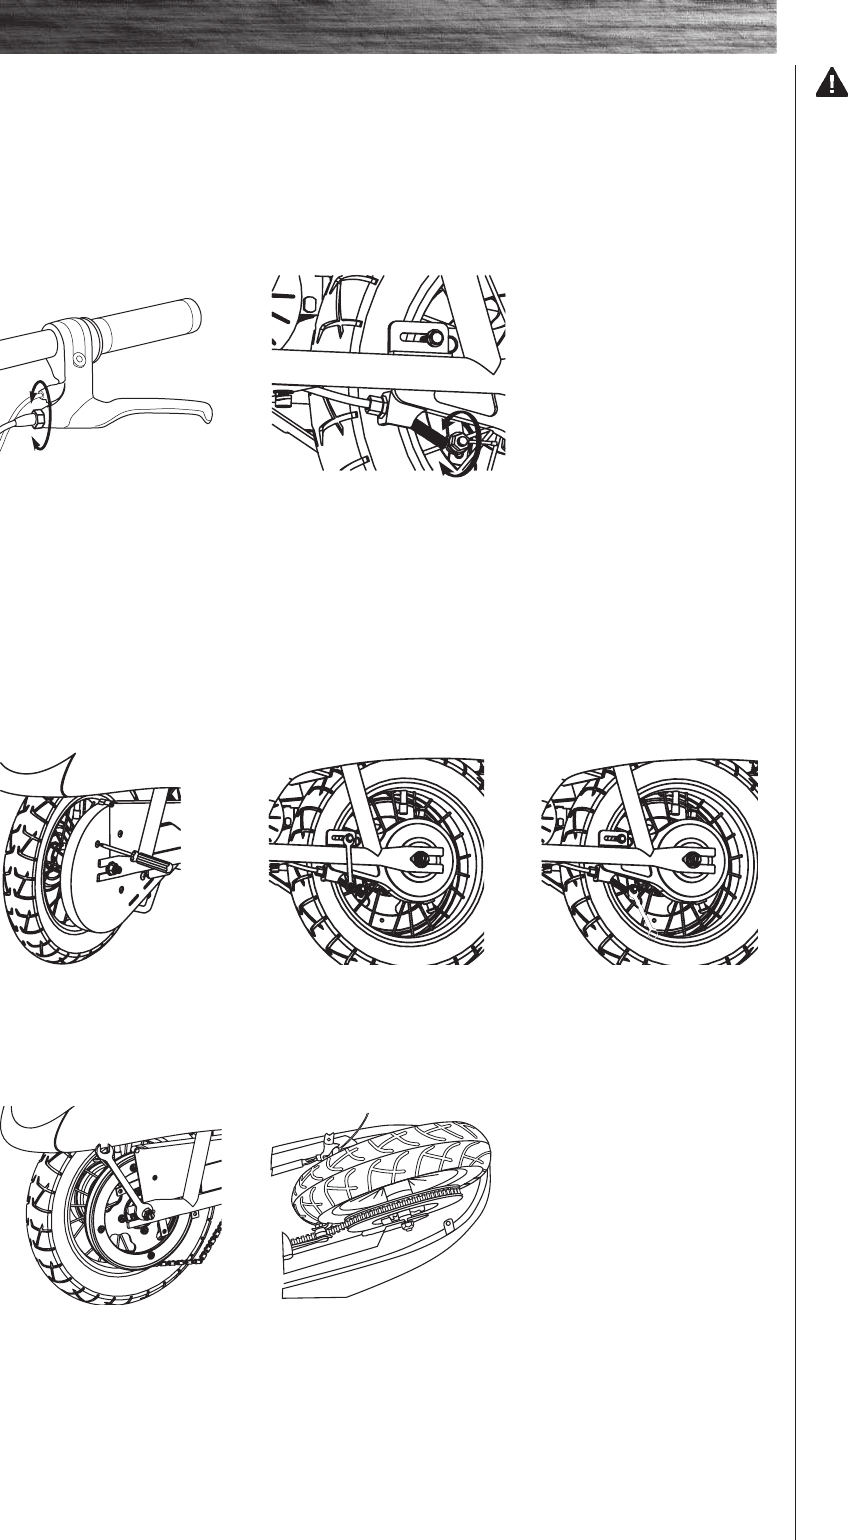
4 With two 15mm wrenches,
loosen the axle. Slide the wheel
forward to loosen the chain and
remove the wheel. Note the
sequence of the hardware.
Note: Your hands will get greasy
doing this.
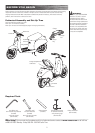
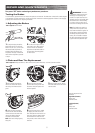
q Chain and Rear Tire Replacement
Tools required: Phillips screwdriver, 10mm wrench, two (2) 8mm wrenches, and two (2) 15mm wrenches.
1 With a Phillips screwdriver,
remove the screws that secure
the chain guard. Remove chain
guard.
2 With two 8mm wrenches,
loosen brake housing anchor and
disconnect. Keep the spacer and
washers together
3 With a 10mm wrench, loosen
the brake cable anchor and discon-
nect the cable.
5 Install the new chain or wheel
by slipping the chain around the
axle. Slide the axle into the slots on
the frame. Slide the wheel forward
and maneuver the chain onto the
rear sprocket, motor shaft and chain
tensioner.
Note the sequence of the
hardware:
Right Side (Throttle)
Safety hook
3/8 Axle locknut
Left Side (Brake)
Spacer
Safety hook
3/8 Axle locknut
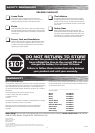
WARNING: The brake
is capable of skidding the tire and
throwing an unsuspecting rider.
Practice in an open area free from
obstacles until you are familiar with
the brake function. Avoid skidding
to a stop as this can cause you to
lose control or damage the rear tire.
Note: The brake lever contains a
safety switch to cut power to the
motor when the brake is applied. In
an emergency, applying the brake
will always stop the product from
moving. Do not disable or replace
this lever with anything other than
a genuine Razor replacement part.
1 To adjust the play, thread the
brake lever adjuster on the hand
brake in or out 1/4 to 1/2 turn until
the desired brake adjustment is
attained. Most adjustments are
complete at this step. If brake still
needs further adjustment, proceed
to step 2.
2 If brake is too tight or has too
much slack, use a 10mm wrench
to loosen the nut for additional
adjustment on the brake cable on
the rear wheel. Securely tighten
nut when done.
Testing the Brakes
To use the brake, squeeze the lever to increase the pressure on the brake. The brake lever is fitted with a cable adjuster
to compensate for cable stretch and/or to fine-tune the lever movement to brake engagement. If brake is not engaging
properly, follow instructions for adjusting the brakes.
q Adjusting the Brakes
Tools required: 10mm wrench
Turn power “OFF” before conducting any maintenance procedures.


Find Your Products By Category
- Lawn and Garden
- Computer Equipment
- TV and Video
- Laundry Appliance
- Kitchen Appliance
- Car Audio and Video
- Automotive
- Photography
- Fitness & Sports
- Personal Care
- Communications
- Home Audio
- Portable Media
- Musical Instruments & Equipment
- Baby
- Household Appliance
- Cell Phone
- Marine Equipment
- Outdoor Cooking
- Power Tools
- Video Game
Please Login
