
0
Owner's of the Razor Wheelchair Razor Wheelchair gave it a score of 0 out of 5. Here's how the scores stacked up:

3
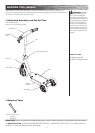
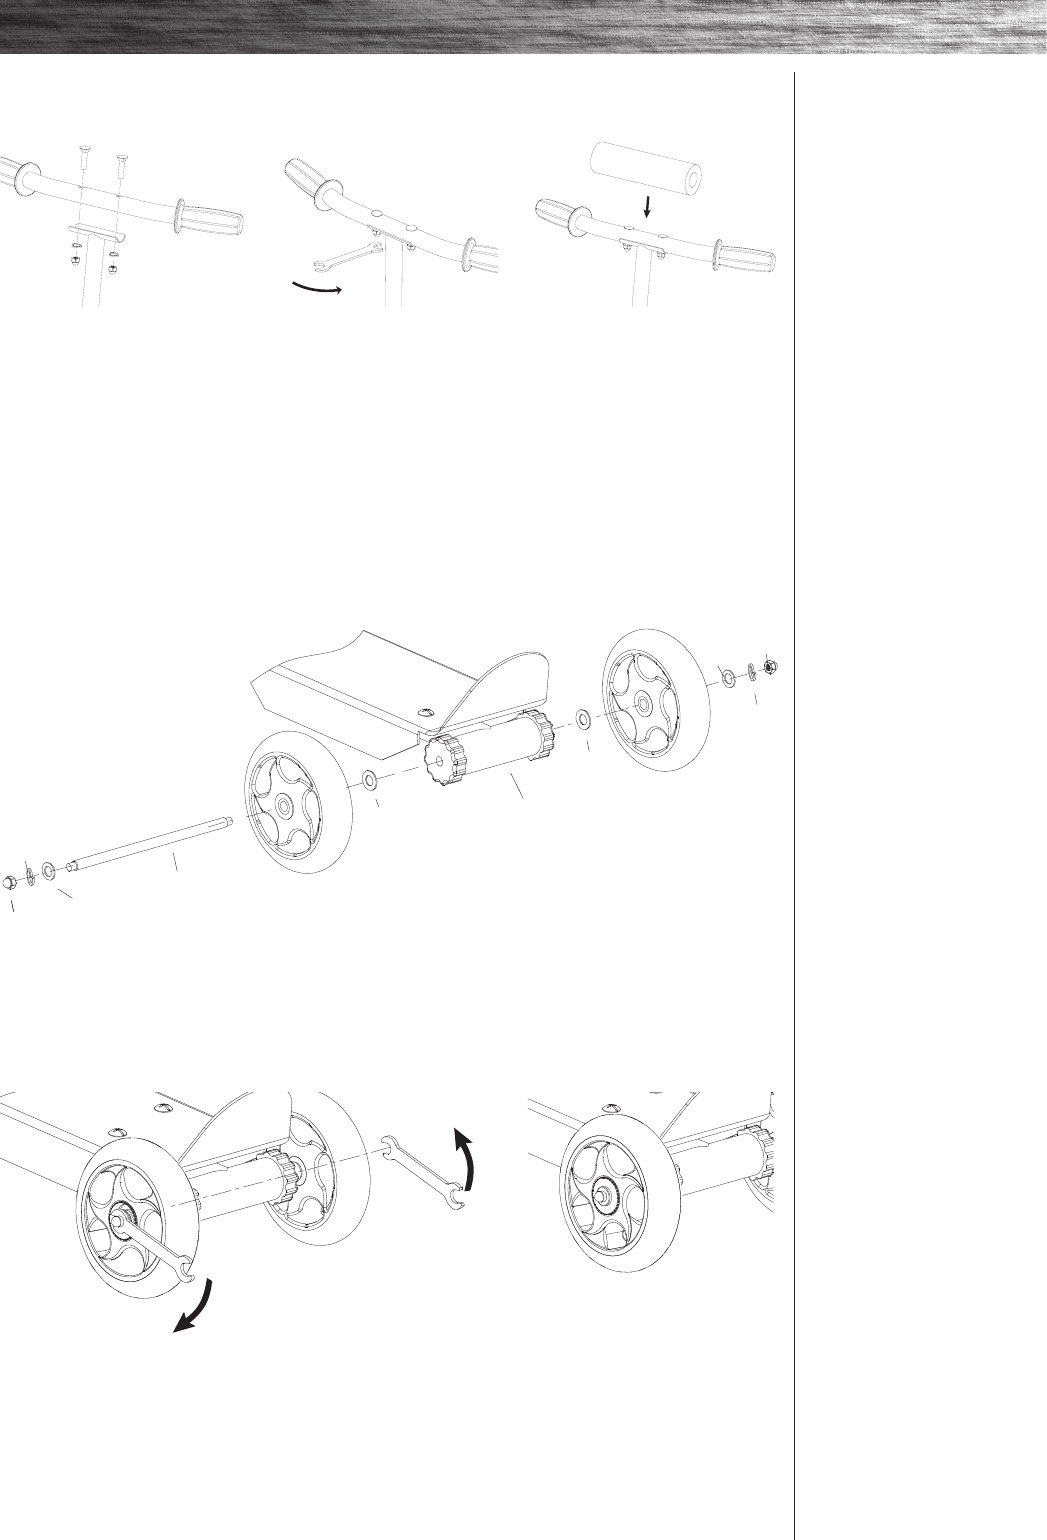
SET-UP AND USAGE
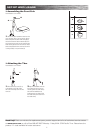
2 Place the handlebar pad over the
handlebars and secure tightly with
the velcro cover.
1 Align the holes on the handlebars and the T-bar. Insert handlebar bolts
into the top of the handlebar and through the T-bar. Install the washers and
nuts onto the bottom of the handlebar bolts. Tighten securely into place
using a 10 mm wrench.
q Assembling the Handlebars
Tools Needed: 10 mm wrench
3-1
3-2
3-3
3-4
3-5
3-5
3-3
3-1
3-2
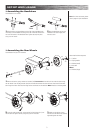
q Assembling the Rear Wheels
Tools Needed: Two (2) 10 mm wrenches
1 Remove the locknut, spring washer and washers (x3) from one side of the axle bolt. Insert the axle bolt through
the rear wheel. Insert the large washer (3-5) onto the axle bolt between the frame and rear wheel and slide the axle
bolt through the frame. Slide the other large washer and wheel onto the axle bolt. Note: Wheels are interchangeable.
2 Insert the small washer (3-3), spring washer (3-2) and locknut (3-1) onto
the axle bolt and tighten securely using two (2) 10 mm wrenches.
3 Make sure the locknut, spring
washer and small washer are securely
tightened against the wheel.
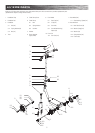
3-1 - Locknut
3-2 - Spring washer
3-3 - Washer (small)
3-4 - Axle bolt
Wheel
3-5 - Washer (large)
Rear wheel hardware sequence
Frame
Note: For further assistance, please
refer to page 5 for parts breakdown.


Find Your Products By Category
- Lawn and Garden
- Computer Equipment
- TV and Video
- Laundry Appliance
- Kitchen Appliance
- Car Audio and Video
- Automotive
- Photography
- Fitness & Sports
- Personal Care
- Communications
- Home Audio
- Portable Media
- Musical Instruments & Equipment
- Baby
- Household Appliance
- Cell Phone
- Marine Equipment
- Outdoor Cooking
- Power Tools
- Video Game
Please Login
