
0
Owner's of the Snow Joe Snow Blower 13-inch 10-amp electric snow shovel gave it a score of 0 out of 5. Here's how the scores stacked up:


7
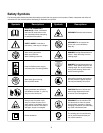
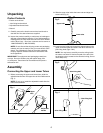
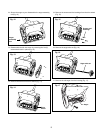
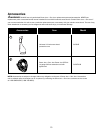
Positioning the Adjustable Handle
1. Move and rotate the adjustable handle to a comfortable
working position (Fig. 5).
2. Tighten the handle knob.
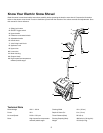
Operation
IMPORTANT: This electric snow shovel is intended for
outdoor, residential use only. Do not use this appliance indoors
or for commercial or industrial purposes.
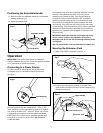
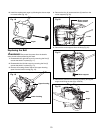
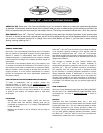
Connecting to a Power Source
To reduce the risk of electric shock, this appliance has
a polarized plug (i.e. one blade is wider than the other;
see Fig. 6).
Use this appliance only with a polarized UL-, CSA- or ETL-
listed extension cord recommended for outdoor, all-weather
use, such as the Snow Joe
®
+ Sun Joe
®
Power Joe SJTW-A
14-gauge 50-foot extension cord with lighted end (Model
PJEXT50-B). Visit snowjoe.com to purchase this extension
cord online or, to order by phone, call 1-866-SNOWJOE
(1-866-766-9563).
The appliance plug will t into a polarized extension cord only
one way. If the appliance plug does not t fully into the
extension cord, reverse the plug. If the plug still does not
t, obtain a correct polarized extension cord. A polarized
extension cord will require the use of a polarized wall outlet.
The extension cord plug will t into the polarized wall outlet
only one way. If the plug does not t fully into the wall outlet,
reverse the plug. If the plug still does not t, contact a qualied
electrician to install the proper wall outlet. Do not modify the
appliance plug, extension cord receptacle or extension cord
plug in any way.
IMPORTANT: Check the extension cord frequently during
use for holes or cracks in the insulation. Do not use a
damaged cord. Do not run the cord through standing water
or wet grass.
Use only an extension cord recommended for outdoor use.
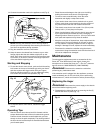
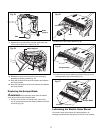
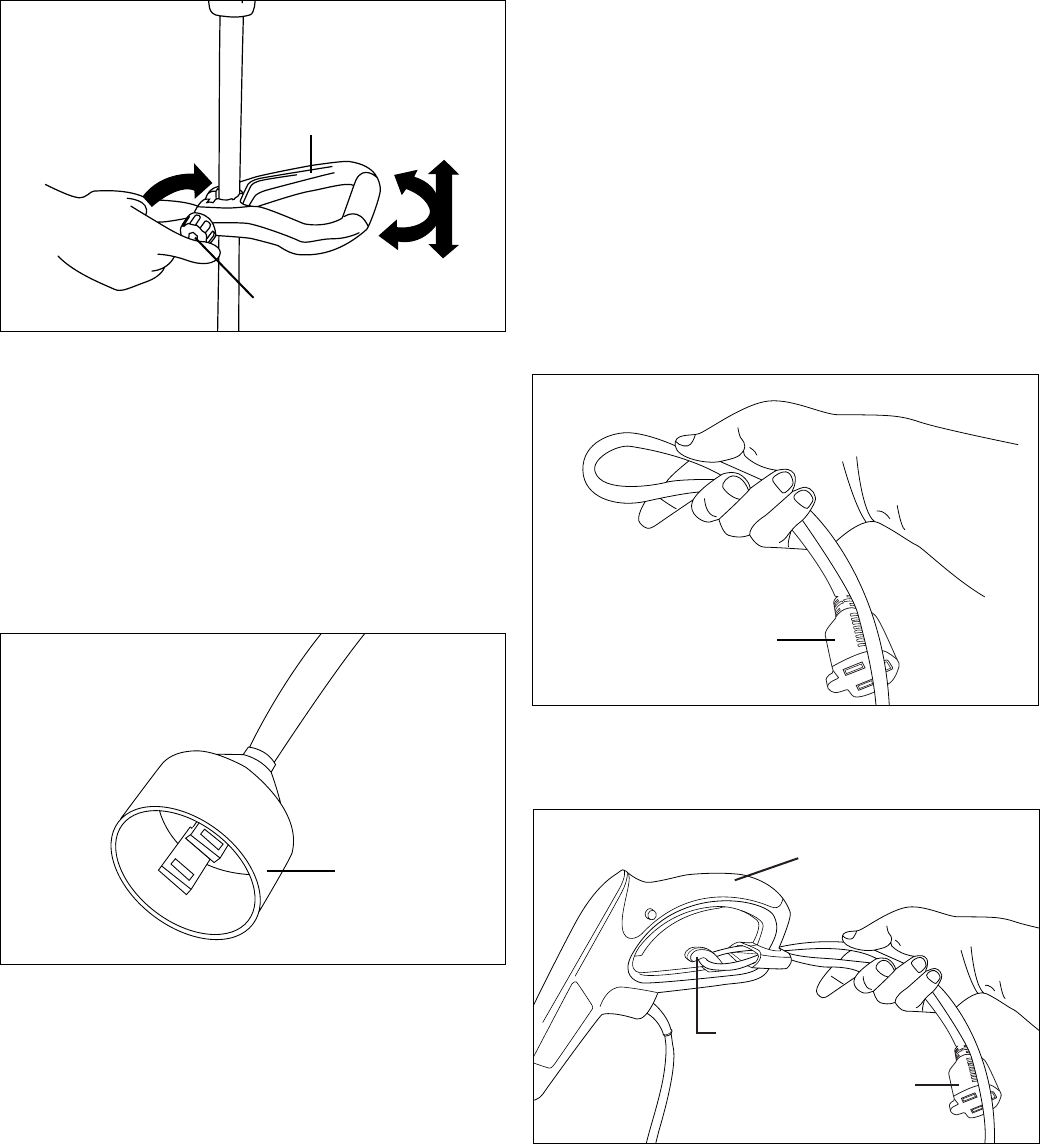
Securing the Extension Cord
1. Make a loop with the extension cord (Fig. 7).
2. Insert the loop through the opening in the back of the
upper handle and secure the loop onto the extension cord
restraint hook (Fig. 8).
Adjustable handle
Handle knob
Fig. 5
Polarized plug
Fig. 6
Extension cord
Fig. 7
Fig. 8
Upper handle
Cord restraint hook
Extension cord


Find Your Products By Category
- Lawn and Garden
- Computer Equipment
- TV and Video
- Laundry Appliance
- Kitchen Appliance
- Car Audio and Video
- Automotive
- Photography
- Fitness & Sports
- Personal Care
- Communications
- Home Audio
- Portable Media
- Musical Instruments & Equipment
- Baby
- Household Appliance
- Cell Phone
- Marine Equipment
- Outdoor Cooking
- Power Tools
- Video Game
Please Login
