
0
Owner's of the Snow Joe Snow Blower SnowJoe gave it a score of 0 out of 5. Here's how the scores stacked up:
10
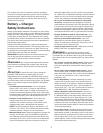
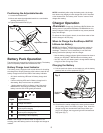
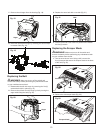
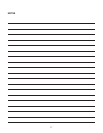
3. Place the battery pack into the charger by sliding the
pack as shown to lock it into position. When you insert
the battery into the charger, the bottom red light will
illuminate to indicate that the battery is charging (Fig. 8).
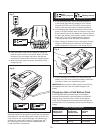
4. When the bottom light turns green, the battery is fully
charged (Fig. 8).
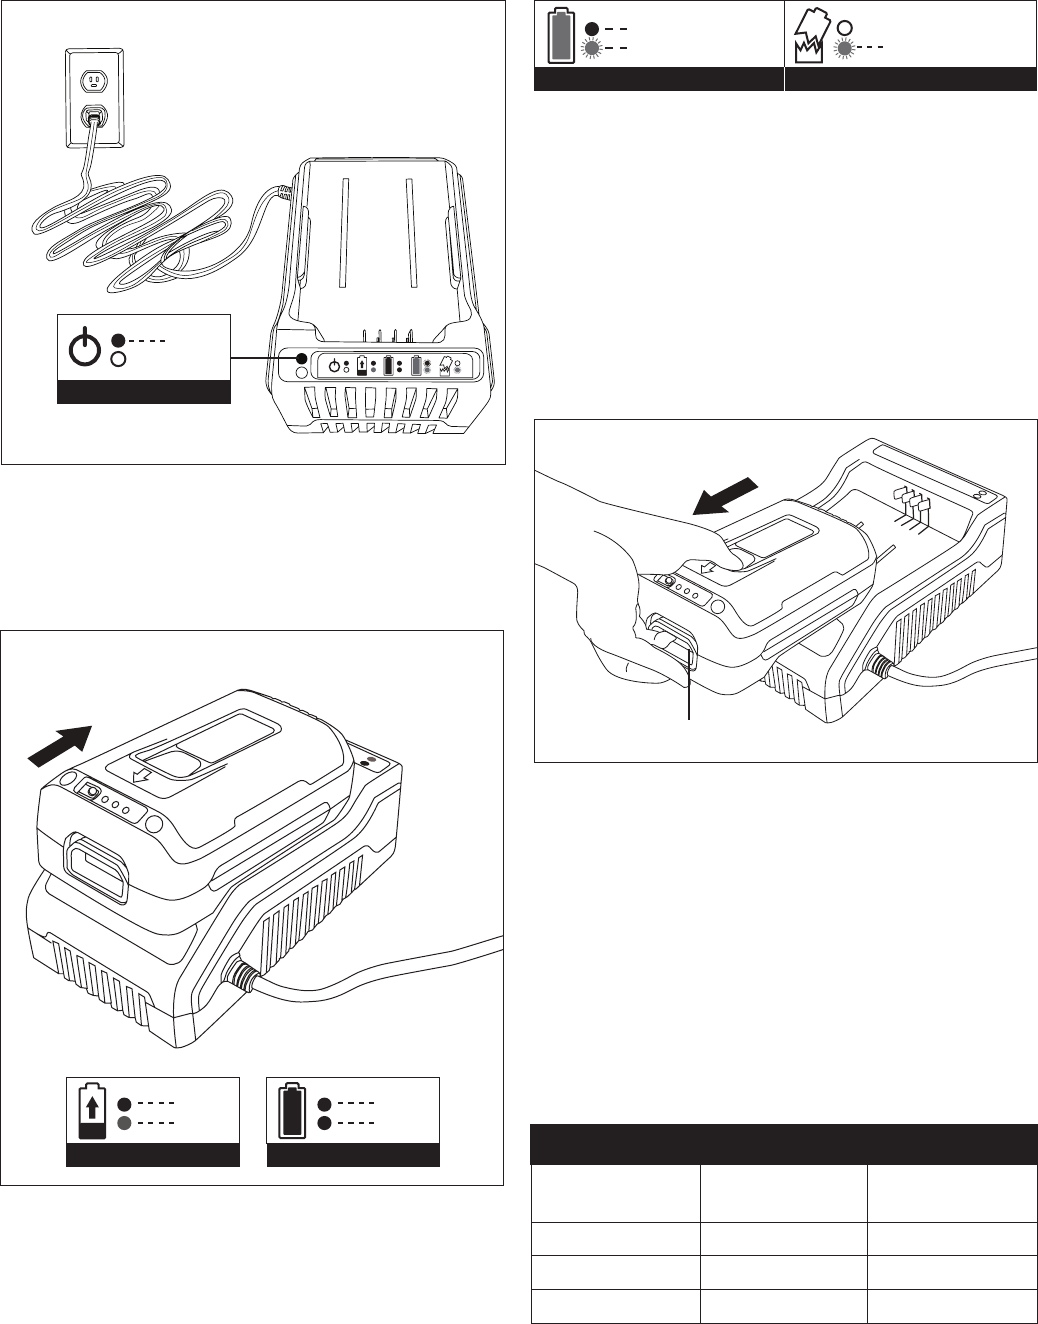
NOTE: If the top light remains green while the bottom light
alternately ashes red and green, this indicates a temperature
abnormality (i.e. that the battery pack is either too hot or too
cold). If there is only a red blinking light, this indicates that
something is wrong with the battery. Contact Snow Joe
®
+
Sun Joe
®
customer service center at 1-866-SNOW-JOE
(1-866-766-9563) for assistance.
5. A fully discharged pack with an internal temperature
in the normal range will fully charge in 2.5 to 3 hours
(between 32ºF/0ºC and 113ºF/45ºC). Heavily cycled
battery packs may take longer to charge completely.
6. If the charging light indicator alternately blinks red and
green or the light indicator does not come on at all, check
that the battery pack is fully seated into the bay. Remove
the pack and reinsert. If the problem persists, contact the
Snow Joe
®
+ Sun Joe
®
customer service center at
1-866-SNOWJOE (1-866-766-9563) for assistance.
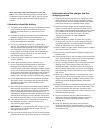
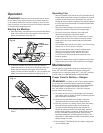
7. When charging is complete, remove the battery from the
charger by pulling the push lock button and sliding the
battery backward to unlock it from the charger (Fig. 9).
8. Timely recharging of the battery will help prolong the
battery's life. You must recharge the battery pack when
you notice a drop in the equipment's power.
IMPORTANT! Never allow the battery pack to become fully
discharged as this will cause irreversible damage to the
battery.
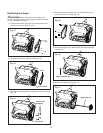
Charging a Hot or Cold Battery Pack
A red and green ashing indicator light on the charger
indicates that the battery pack temperature is outside the
charging range. Once the pack is within the acceptable
range, normal charging will take place and the red light will
be continuous. Hot or cold battery packs may take longer to
charge.
Fig. 7
green
Power on
Fig. 8
green
green
Fully charged
green
red
Charging
Green
Flashing red/green
Temperature abnormal
Flashing red only
Something is wrong
Fig. 9
Push lock button
Battery Pack
Temperature
Lithium-Ion Charging Status
Too hot Flashing Not charging
Normal range Continuous Normal charging
Too cold Flashing Not charging
Red Charger
Indicator Light
Charging
Status


Find Your Products By Category
- Lawn and Garden
- Computer Equipment
- TV and Video
- Laundry Appliance
- Kitchen Appliance
- Car Audio and Video
- Automotive
- Photography
- Fitness & Sports
- Personal Care
- Communications
- Home Audio
- Portable Media
- Musical Instruments & Equipment
- Baby
- Household Appliance
- Cell Phone
- Marine Equipment
- Outdoor Cooking
- Power Tools
- Video Game
Please Login
