
0
Owner's of the Snow Joe Snow Blower 40 Volt 18 Inch Cordless Snow Blower - Core Tool gave it a score of 0 out of 5. Here's how the scores stacked up:


7
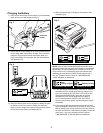
Unpacking
Carton Contents:
• Cordless snow blower
• Safety key
• Handle knobs/Deector knobs (4)
• Square J-bolts (2)
• Carriage bolts (2)
• Rubber washers (2)
• Manual with registration card
NOTE: In order to operate this snow blower, you will need to
additionally purchase either the EcoSharp
®
(model iBAT40)
or EcoSharp
®
PRO (model IBAT40XR) lithium-ion battery
and either the EcoSharp
®
charger (model iCHRG40) or the
EcoSharp
®
SWIFT charger (model iCHRG40QC).
1. Carefully remove the cordless snow blower and check to
see that all of the above items are supplied.
2. Inspect the product carefully to make sure no breakage or
damage occurred during shipping. If you nd damaged or
missing parts, DO NOT return the unit to the store. Please
call the Snow Joe
®
+ Sun Joe
®
customer service center at
1-866-SNOWJOE (1-866-766-9563).
NOTE: Do not discard the shipping carton and packaging
material until you are ready to use your new cordless snow
blower. The packaging is made of recyclable materials.
Properly dispose of these materials in accordance with
local regulations.
IMPORTANT! The equipment and packaging material are
not toys. Do not let children play with plastic bags, foils
or small parts. These items can be swallowed and pose a
suocation risk!
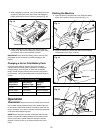
Assembly
Assembling the handles
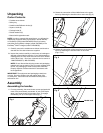
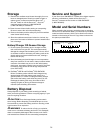
1. For easy assembly, the snow blower comes equipped with
most of the parts already connected. In just a few simple
steps, your snow blower will be ready to go. To engage
the handle, pull up on the upper frame (Fig. 1).
2. Secure the connection of the middle frame to the upper
frame by fastening the handle locks on each side (Fig. 2).
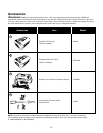
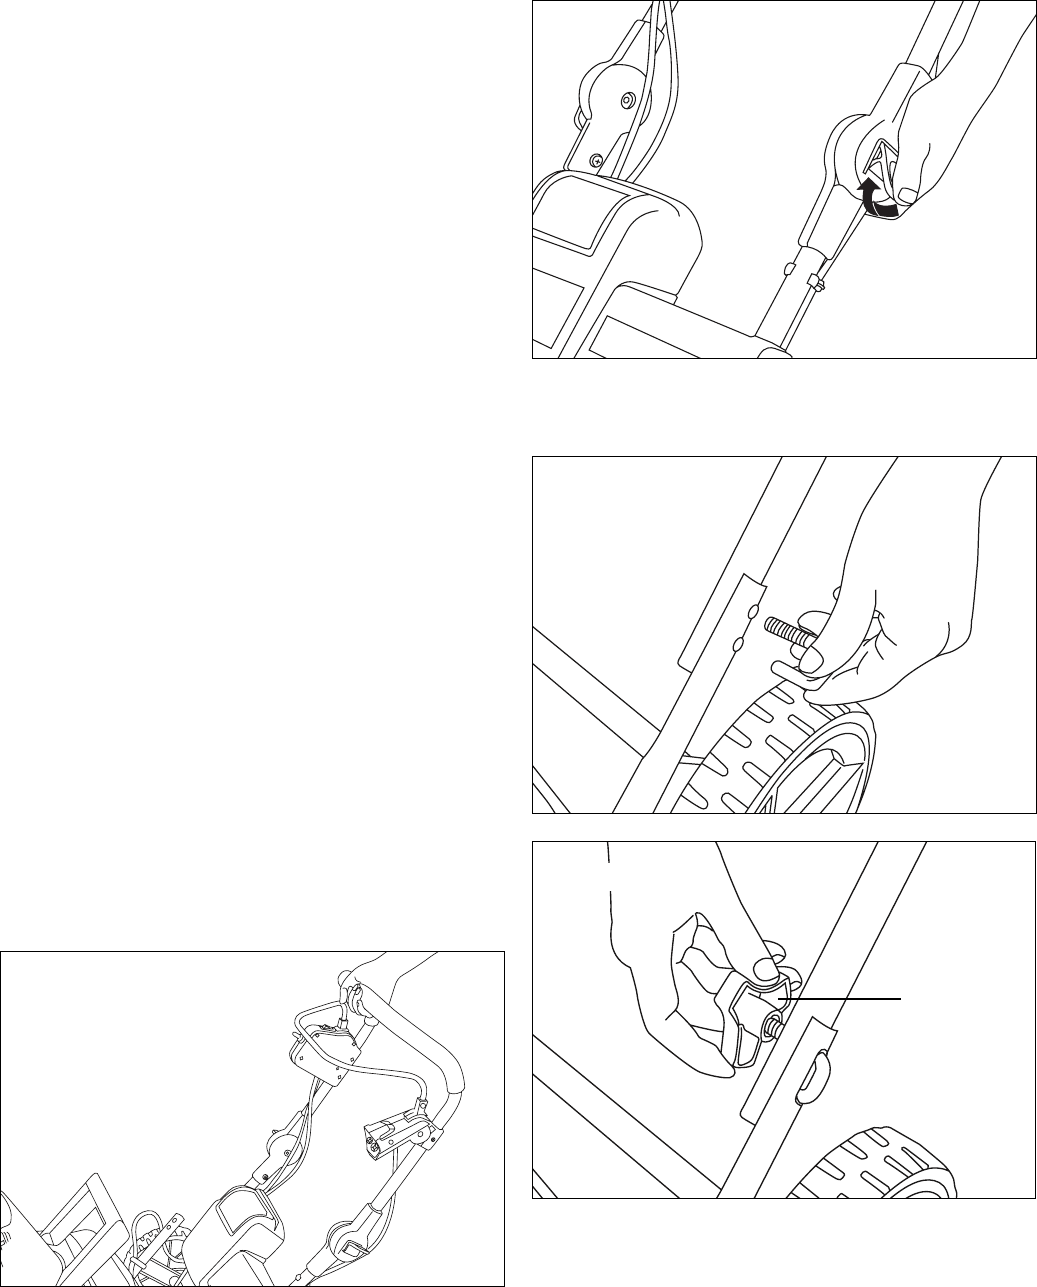
3. Secure the connection of the lower frame to the middle
frame by fastening the handle knobs on each side
(Figs. 3 & 4).
Fig. 1
Fig. 2
Fig. 3
Fig. 4
Handle knob


Find Your Products By Category
- Lawn and Garden
- Computer Equipment
- TV and Video
- Laundry Appliance
- Kitchen Appliance
- Car Audio and Video
- Automotive
- Photography
- Fitness & Sports
- Personal Care
- Communications
- Home Audio
- Portable Media
- Musical Instruments & Equipment
- Baby
- Household Appliance
- Cell Phone
- Marine Equipment
- Outdoor Cooking
- Power Tools
- Video Game
Please Login
