
4.5
Owner's of the Canon All in One Printer Canon Pixma Mx922 Inkjet Multifunction Printer gave it a score of 4.5 out of 5. Here's how the scores stacked up:
2
1
2
1
2
5
6
1
2
2
4
1
2
3
8
(B)(A)
1
2
7
7
1
2
1
2
Cuando aparezca esta pantalla,
pulse el botón OK.
77
Abra la cubierta de documentos y
la cubierta de la tinta.
11
Sujete la tapa naranja con los
dedos y tire de ella suavemente.
(A) No presione los laterales si la
ranura en forma de Y está bloqueada.
(B) ¡No tocar!
33
Introduzca y empuje hacia abajo el depósito de tinta en la ranura del color correspondiente.
Compruebe que la lámpara de tinta está encendida y coloque el siguiente depósito de tinta.
44
Compruebe que todas las
lámparas están encendidas.
55
Si aparece un mensaje de error,
compruebe que los depósitos de tinta
están instalados correctamente.
Compruebe que la cubierta interior está cerrada.
Cierre la cubierta de la tinta y la cubierta de documentos.
¡No cierre aún la bandeja de salida del papel!
66
Los depósitos de tinta deberán instalarse en este soporte.
No toque el interior hasta que cese el movimiento.
Retire totalmente la cinta naranja.
Retire el envoltorio protector.
22
Cubierta interior
Cierre la bandeja de salida del
papel.
La extensión de la bandeja de salida se
cierra automáticamente.
88
Al cabo de aproximadamente
3 minutos, compruebe que la
pantalla ha cambiado tal como se
muestra en la gura.
77
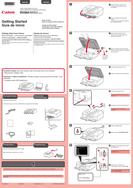
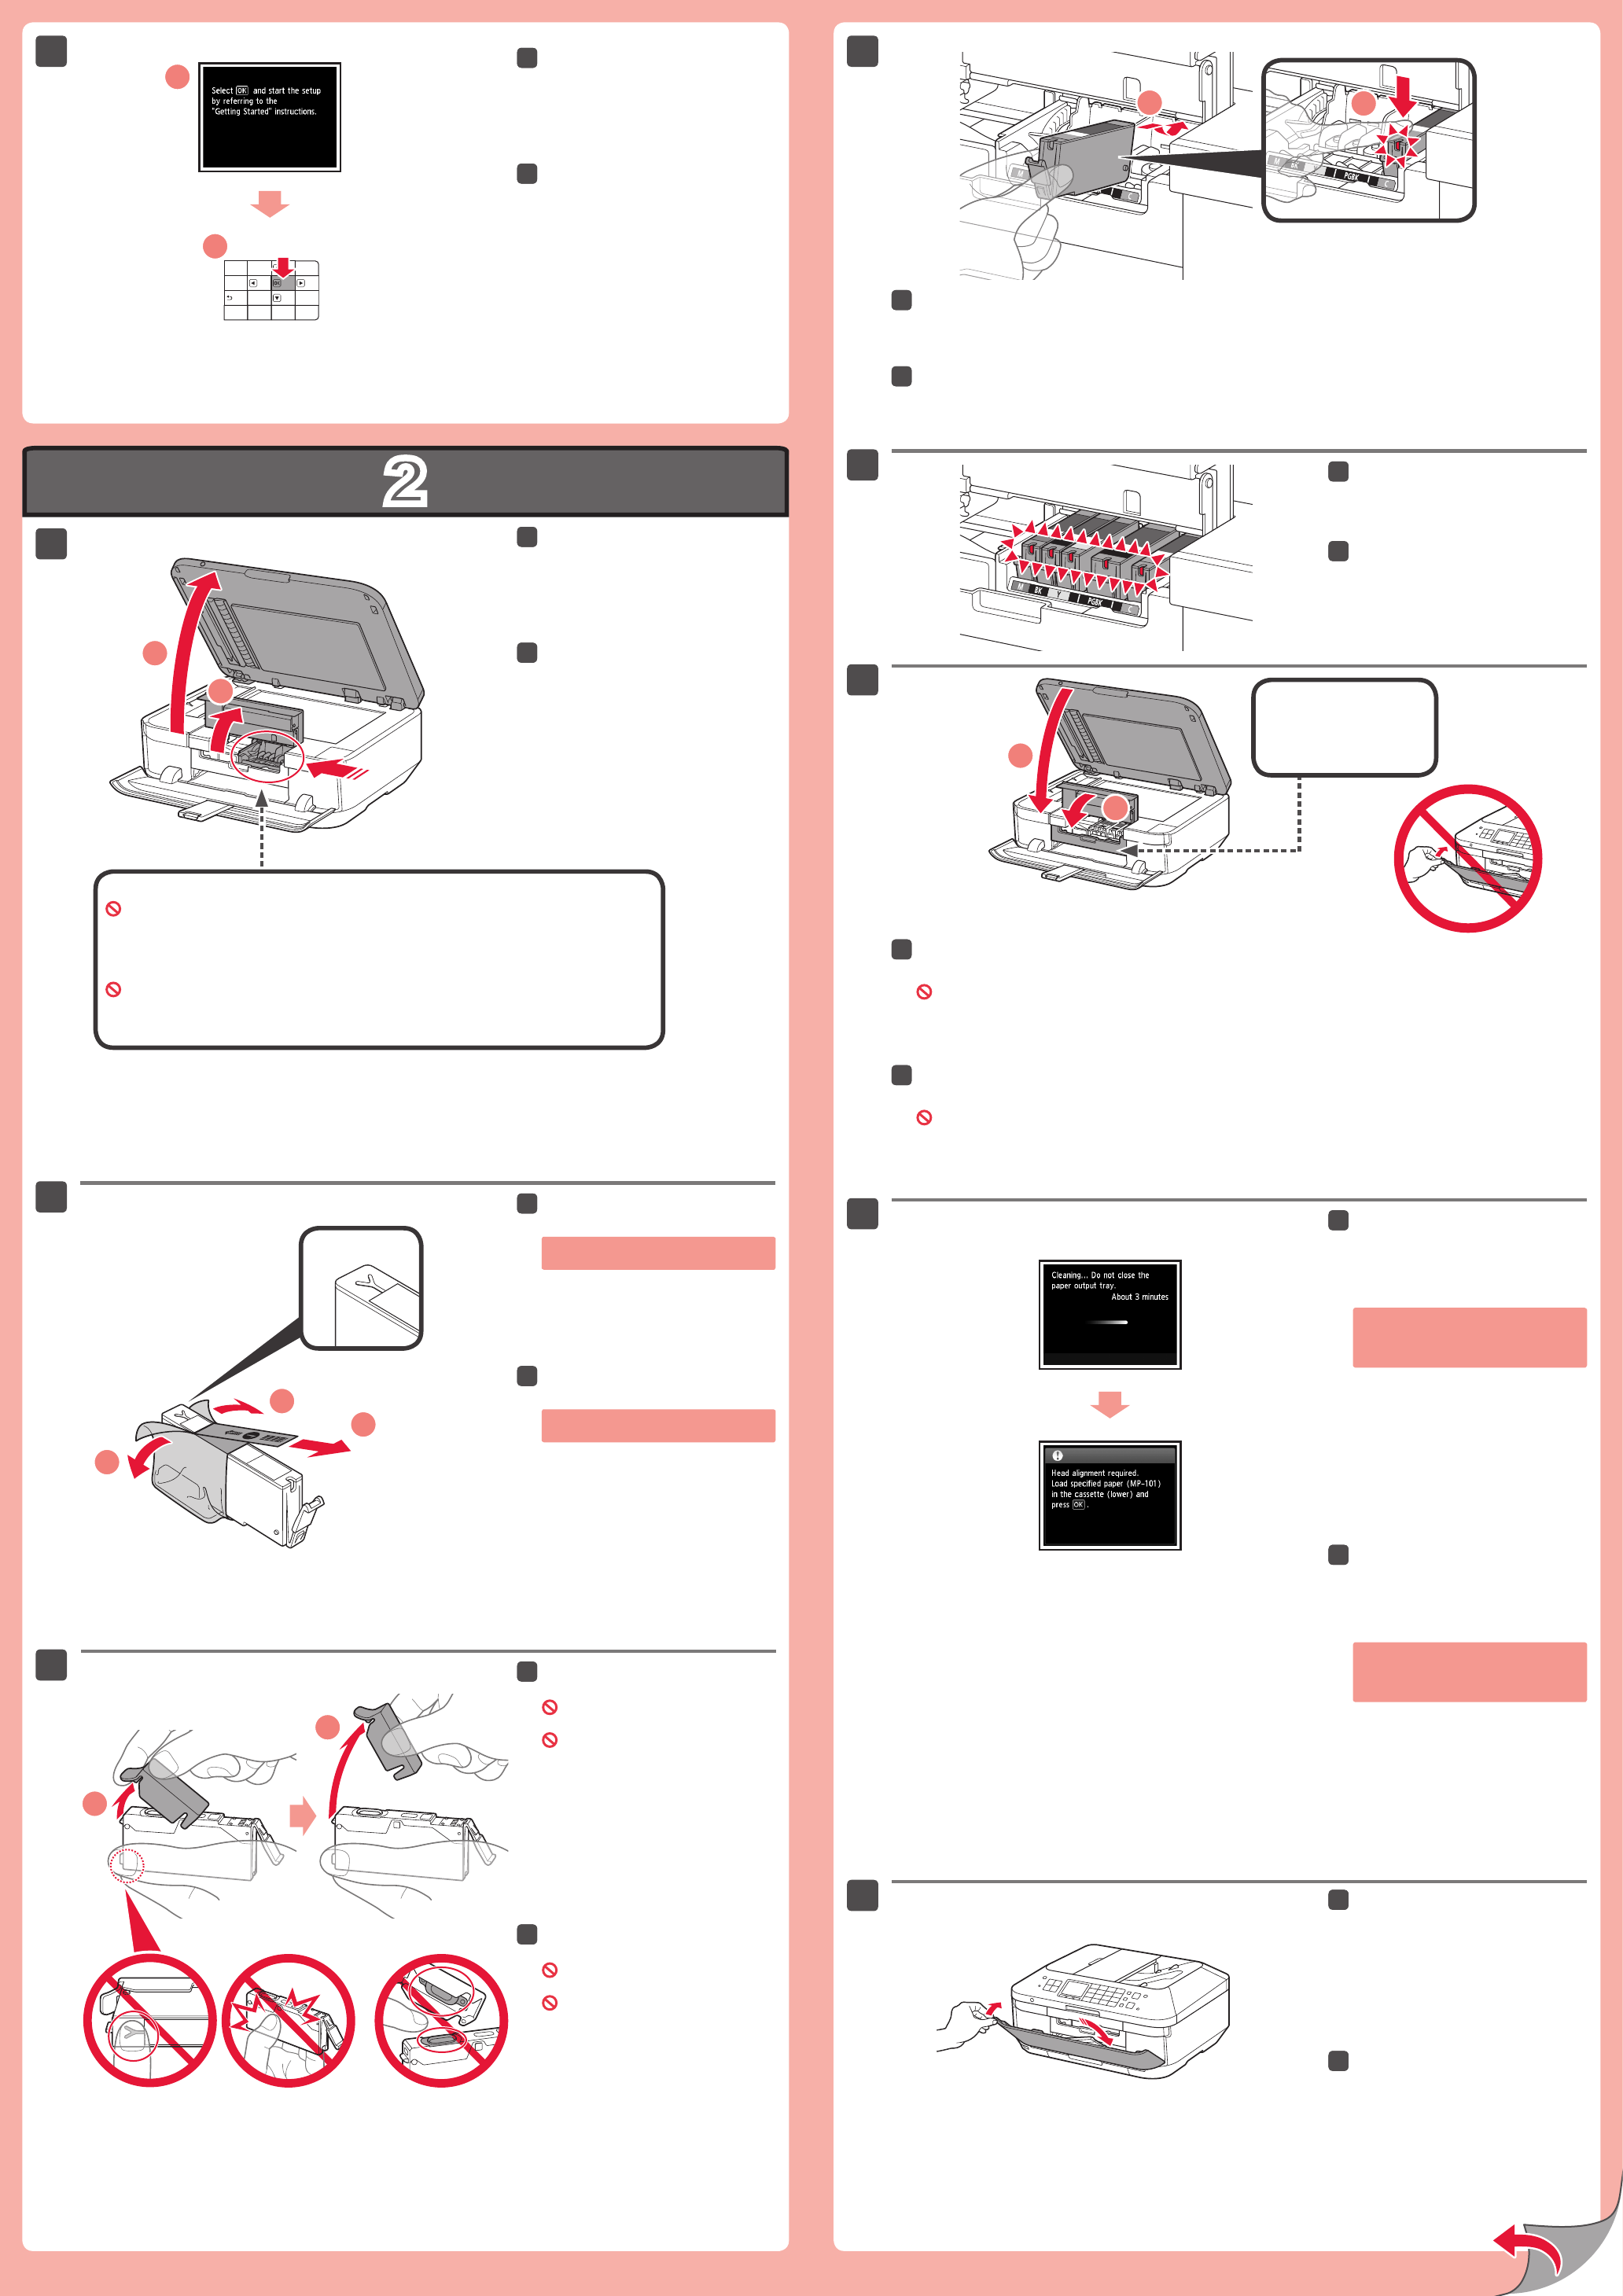
Open the Document Cover and the
Ink Cover.
11
Hook your ngers under the
orange cap and slowly pull it out.
(A) Do not press the sides when the
Y-shaped groove is blocked.
(B) Do not touch!
33
Insert and push down the ink tank into the matching color slot.
Check that the ink lamp is lit, then install the next ink tank.
44
Check that all lamps are lit.
55
If an error message appears, check
that the ink tanks are installed correctly.
Check that the Inner Cover is closed.
Close the Ink Cover and the Document Cover.
Don't close the Paper Output Tray yet!
66
When this screen is displayed,
press the OK button.
77
Remove the orange tape completely.
Remove the protective wrap.
22
The ink tanks will be installed into this holder.
Do not touch inside until the movement stops.
Inner Cover
Close the Paper Output Tray.
The Output Tray Extension closes
automatically.
88
After about 3 minutes, check that
the screen changes as shown in
the gure.
77


Find Your Products By Category
- Lawn and Garden
- Computer Equipment
- TV and Video
- Laundry Appliance
- Kitchen Appliance
- Car Audio and Video
- Automotive
- Photography
- Fitness & Sports
- Personal Care
- Communications
- Home Audio
- Portable Media
- Musical Instruments & Equipment
- Baby
- Household Appliance
- Cell Phone
- Marine Equipment
- Outdoor Cooking
- Power Tools
- Video Game
Please Login
