
4.5
Owner's of the Canon All in One Printer Canon Pixma Mx922 Inkjet Multifunction Printer gave it a score of 4.5 out of 5. Here's how the scores stacked up:
3
4
2
1
4
3
1
2
1
2
1
2
1
2
5
6
1
2
7
8
1
3
2
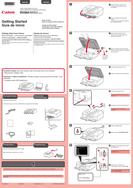
Realice la Alineación de los cabezales de impresión (Print Head Alignment).
Cuando aparezca esta pantalla,
pulse el botón OK.
77
Cuando aparezca esta pantalla,
cierre el soporte de la salida del
papel.
11
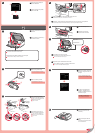
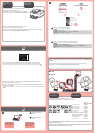
Cargue papel en el cassette como se describe en -
hasta -
.
Ajuste las guías del papel al tamaño del papel.
22
Cargue el papel MP-101
suministrado en el cassette.
33
Pulse el botón OK.
33
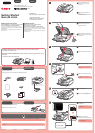
Extraiga el cassette (inferior).
11
Si aparece un mensaje
de error, pulse el botón
OK y continúe con
.
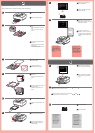
Cuando nalice la
instalación, consulte el
Manual en pantalla o
el Manual en línea para
repetir la Alineación de los
cabezales de impresión
(Print Head Alignment).
Al cabo de 5 a 6 minutos, se
imprime un patrón en negro y azul.
La Alineación de los cabezales de
impresión (Print Head Alignment)
naliza.
88
Ajuste la guía del papel derecha al
tamaño del papel.
Deslice el papel contra la guía
frontal.
44
Para obtener más
información sobre
el papel, consulte el
Manual en pantalla o
el Manual en línea.
Cuando el equipo
no se utiliza durante
unos 5 minutos, la
pantalla se desconecta.
Para reactivarla,
pulse cualquier botón
(excepto el botón
ACTIVADO (ON)) en el
panel de control.
•
•
Ajuste la guía del papel frontal al
tamaño A4.
Deslice la guía del papel derecha
hacia el lado.
Las guías del papel izquierda y derecha
se mueven al mismo tiempo.
22
Deslice el cassette (inferior) hacia
atrás.
55
Abra la bandeja de salida del
papel. Extraiga el soporte de la
salida del papel.
66
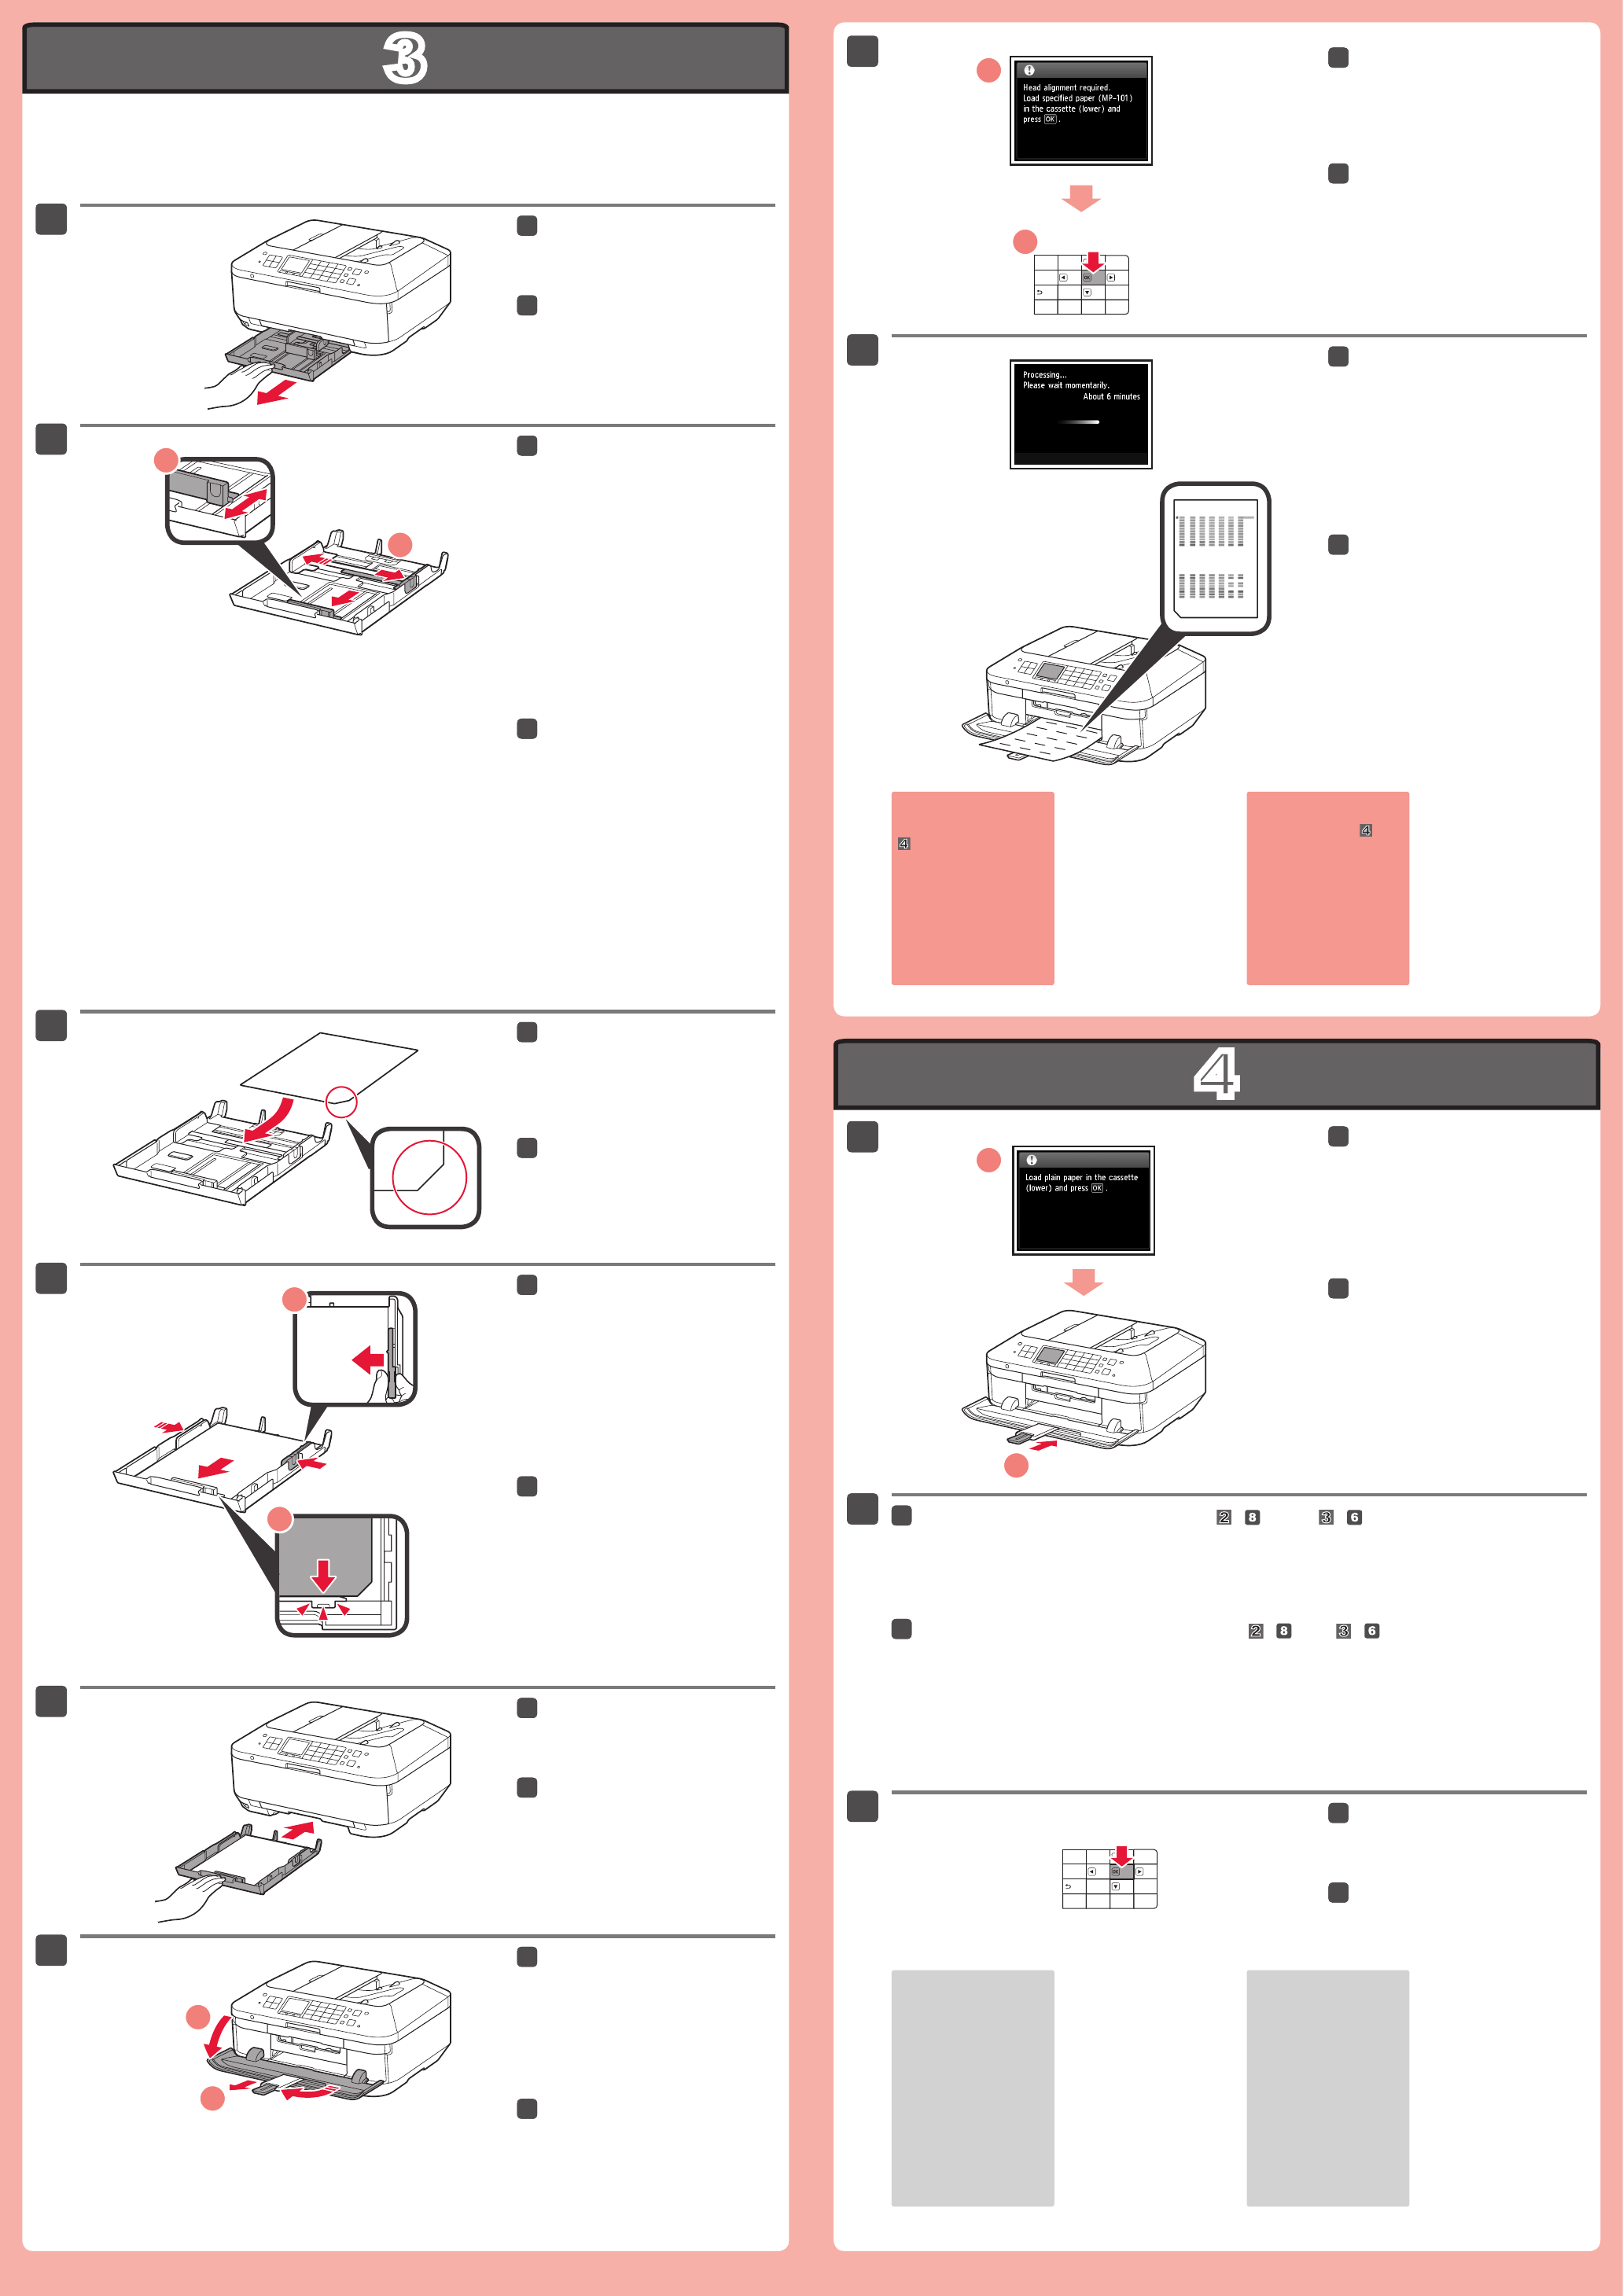
Perform the Print Head Alignment.
Pull out the Cassette (Lower).
11
When this screen is displayed,
press the OK button.
77
In about 5 to 6 minutes, a blue-
black pattern is printed. Print Head
Alignment is complete.
88
When this screen is displayed,
close the Paper Output Support.
11
Load paper into the Cassette as described in
-
through
-
.
Adjust the Paper Guides to t the paper size.
22
Load the supplied MP-101 paper
into the Cassette.
33
Adjust the right guide to t the
paper size.
Slide the paper against the front
guide.
44
For information about
paper, refer to the
On-screen Manual or
Online Manual.
The screen turns off
if the machine is not
operated for about 5
minutes. To restore
the display, press any
button (except the
ON button) on the
Operation Panel.
•
•
Press the OK button.
33
If an error message
appears, press the OK
button, then proceed to
. After installation is
complete, refer to the On-
screen Manual or Online
Manual to redo Print Head
Alignment.
Adjust the front Paper Guide to A4
size.
Slide the right Paper Guide to the
side.
The left and right Paper Guide move
together.
22
Slide the Cassette (Lower) back.
55
Open the Paper Output Tray. Pull
out the Paper Output Support.
66


Find Your Products By Category
- Lawn and Garden
- Computer Equipment
- TV and Video
- Laundry Appliance
- Kitchen Appliance
- Car Audio and Video
- Automotive
- Photography
- Fitness & Sports
- Personal Care
- Communications
- Home Audio
- Portable Media
- Musical Instruments & Equipment
- Baby
- Household Appliance
- Cell Phone
- Marine Equipment
- Outdoor Cooking
- Power Tools
- Video Game
Please Login
