
0
Owner's of the Razor Automobile ELECTRIC-POWERED GO KART gave it a score of 0 out of 5. Here's how the scores stacked up:
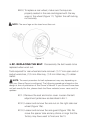

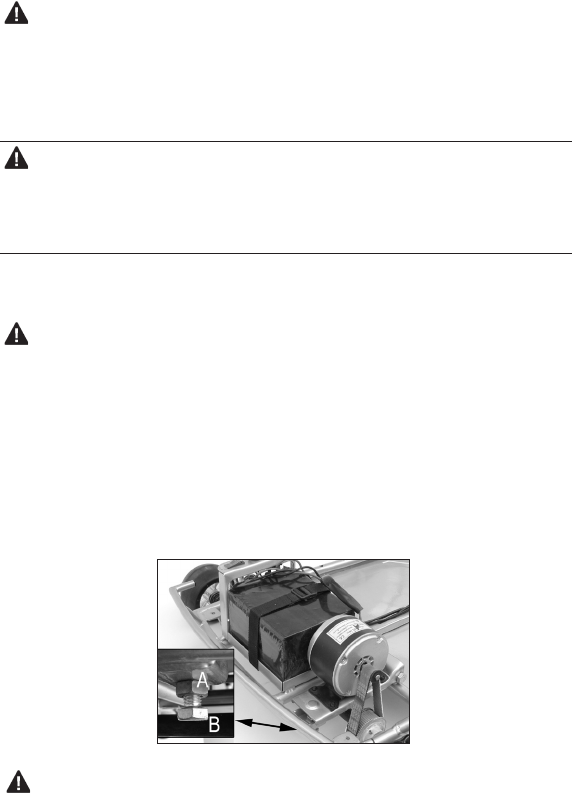
❏ 4A. ADJUSTING THE BELT. The circuit breaker (next to charger
input port in Figure 7a) will automatically shut off the power to the motor
in the event an overload condition is placed on the motor. An excessive
overload, such as too heavy a driver or to
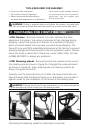
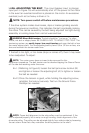
NOTE: Turn power switch off before maintenance procedures.
If the drive system makes loud noises, slips or makes grinding sounds
during the power-on condition, this indicates the belt is probably making
the noise. This can be caused by the belt being adjusted too tight during
assembly or coming loose from normal wear-and-tear.
WARNING About Belt tension: The belt should be “just snug.” In other
words, not taut or sloppy loose. BE CAREFUL NOT TO ADJUST TOO TIGHT. The
tensioning system can easily impart too much tension and snap the belt or ben
the motor output shaft. Turn the adjusting bolt by hand 1/8 to 1/4 turn or less, at a
time and recheck the tension each time.
If the belt is too tight, or too loose (skips or comes off), then it may need
to be readjusted. To adjust:
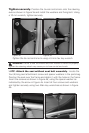
NOTE: The motor cover does not need to be removed for this
adjustment procedure. The belt tension can be checked tipping the Ground Force
on it’s side and reaching under the cover.
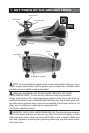
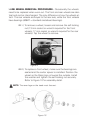
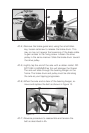
4A-1.) Referring to Figure 8, loosen the belt jack-screw locknut (B)
and tighten or loosen the adjusting bolt (A) to tighten or loosen
the belt as needed.
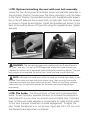
4A-2.) Once the tension is good, while holding the adjusting screw,
retighten the locknut securely. Test run the Ground Force.
Re-adjust as needed.
NOTE: Proper belt alignment to the axle pulley must be maintained. If the
belt is adjusted properly, but is noisy or rough running, check alignment of the
drive-axle pulley. The pulley can be adjusted slightly from side-to-side by loosening
the set screw. Note that a key maintains the drive position to the shaft.
Figure 8


Find Your Products By Category
- Lawn and Garden
- Computer Equipment
- TV and Video
- Laundry Appliance
- Kitchen Appliance
- Car Audio and Video
- Automotive
- Photography
- Fitness & Sports
- Personal Care
- Communications
- Home Audio
- Portable Media
- Musical Instruments & Equipment
- Baby
- Household Appliance
- Cell Phone
- Marine Equipment
- Outdoor Cooking
- Power Tools
- Video Game
Please Login
