

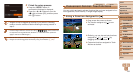
1.3
Owner's of the Canon Digital Camera 8407B001 gave it a score of 1.3 out of 5. Here's how the scores stacked up:


126
1
2
3
4
5
6
7
8
9
10
Cover
Before Use
Common Camera
Operations
Advanced Guide
Camera Basics
Auto Mode /
Hybrid Auto Mode
Other Shooting
Modes
Tv, Av, M, and
C Mode
Playback Mode
Wi-Fi Functions
Setting Menu
Accessories
Appendix
Index
Basic Guide
P Mode
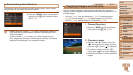
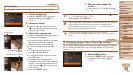
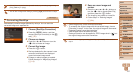
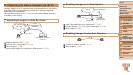
2 Choose an image.
Press the <q><r> buttons or turn the
<7> dial to choose an image, and then
press the <m> button.
3 Choose an option.
Press the <q><r> buttons or turn the
<7> dial to choose an option, and then
press the <m> button.
4 Save as a new image and
review.
Follow steps 4 – 5 in “Resizing Images”
(=
124).
•Imagequalityofpicturesyourepeatedlyeditthiswaywillbealittle
lower each time, and you may not be able to obtain the desired
color.
•Colors of RAW images cannot be edited.
• The color of images edited using this function may vary slightly from the color
of images shot using My Colors (=
78).
• Youcanalsocongurethissettingbytouchinganoptiontoselectitonthe
screen in step 3 and then touching it again.
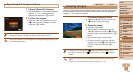
Still Images
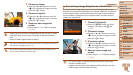
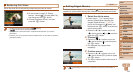
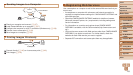
Correcting Image Brightness (i-Contrast)
Excessively dark image areas (such as faces or backgrounds) can be
detectedandautomaticallyadjustedtotheoptimalbrightness.Insufcient
overall image contrast is also automatically corrected, to make subjects
stand out better. Choose from four correction levels, and then save the
imageasaseparatele.
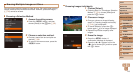
1 Choose [i-Contrast].
Press the <n> button, and then
choose [i-Contrast] on the [1] tab
(=
25).
2 Choose an image.
Press the <q><r> buttons or turn the
<7> dial to choose an image, and then
press the <m> button.
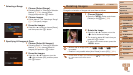
3 Choose an option.
Press the <q><r> buttons or turn the
<7> dial to choose an option, and then
press the <m> button.
4 Save as a new image and
review.
Follow steps 4 – 5 in “Resizing Images”
(=
124).
•For some images, correction may be inaccurate or may cause
images to appear grainy.
•Images may look grainy after repeated editing using this function.
•RAW images cannot be edited this way.


Find Your Products By Category
- Lawn and Garden
- Computer Equipment
- TV and Video
- Laundry Appliance
- Kitchen Appliance
- Car Audio and Video
- Automotive
- Photography
- Fitness & Sports
- Personal Care
- Communications
- Home Audio
- Portable Media
- Musical Instruments & Equipment
- Baby
- Household Appliance
- Cell Phone
- Marine Equipment
- Outdoor Cooking
- Power Tools
- Video Game
Please Login
