
0
Owner's of the Razor Automobile Razor Automobile gave it a score of 0 out of 5. Here's how the scores stacked up:
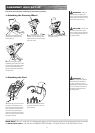
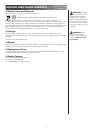
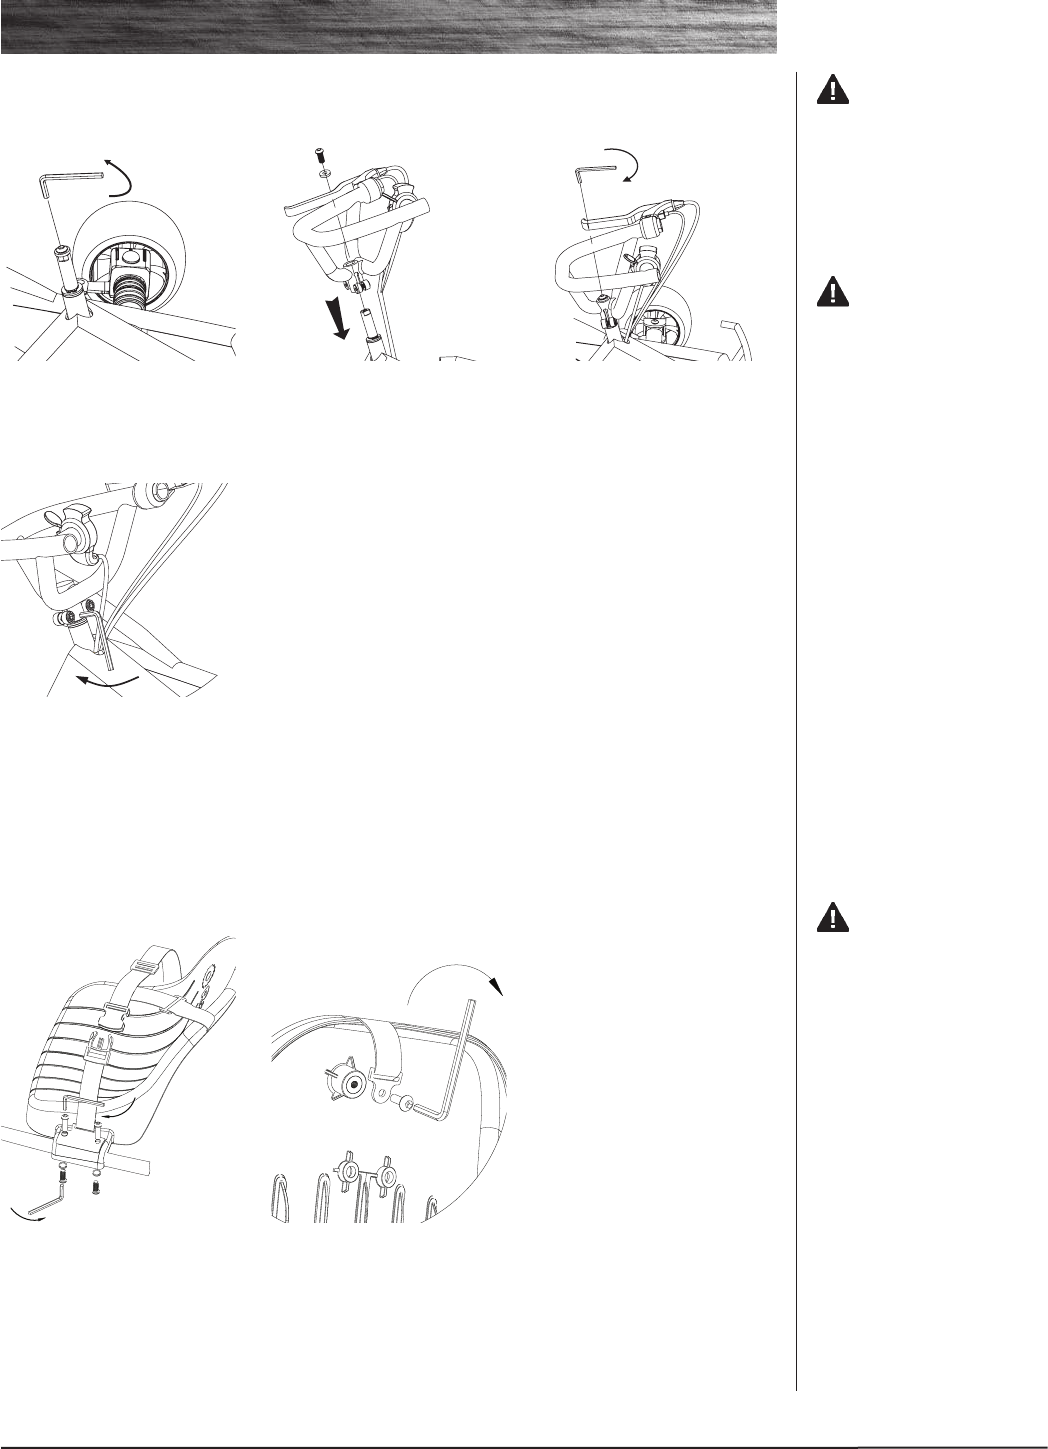
Turn power switch off before conducting any maintenance procedures.
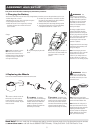
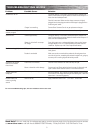
1 Position the seat over the frame
and align it with the holes in the
frame. Align the safety belt anchor
holes to the holes in the seat and
frame with the lap/shoulder as-
sembly on the left and the receiver
latch on the right. Insert the screws
and tighten securely.
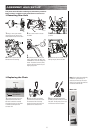
2 Install the shoulder belt anchor
to the back of the seat. Insert and
tighten securely.
3
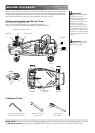
ASSEMBLY AND SET-UP
q Attaching the Steering Wheel
q Attaching the Seat
WARNING: Failure to
properly install and tighten the
screws, nuts and bolts that affix the
steering wheel and seat can cause
you to lose control and crash.
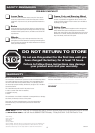
CAUTION: DO NOT flip
the Ground Force Drifter upside
down to tighten steering axle bolts
as it may damage control wires on
the steering wheel.
WARNING: The
safety belt arrangement supplied
with the Ground Force Drifter is
for “play” use only. It is not an
ASTM-approved safety belt system
and is not intended to function as
an approved lap/shoulder/seat
restraining device.
Need Help? Visit our web site for replacement parts, product support and a list of authorized service centers
at www.razor.com or call toll-free at 866-467-2967 Monday - Friday 8:00 AM - 5:00 PM Pacific Time.
1 Using a 5mm Allen wrench,
loosen the screw located in the
steering column.
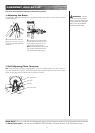
4 Using a 5mm Allen wrench,
alternately tighten each of the bolts
on the steering wheel clamp. When
the bolts are properly tightened,
the gap between the clamp halves
should be even.
2 Make sure the wires are not
tangled. Insert the steering wheel,
washer and screw into the steering
column as shown.
3 Tighten screw securely using a
5mm Allen wrench.


Find Your Products By Category
- Lawn and Garden
- Computer Equipment
- TV and Video
- Laundry Appliance
- Kitchen Appliance
- Car Audio and Video
- Automotive
- Photography
- Fitness & Sports
- Personal Care
- Communications
- Home Audio
- Portable Media
- Musical Instruments & Equipment
- Baby
- Household Appliance
- Cell Phone
- Marine Equipment
- Outdoor Cooking
- Power Tools
- Video Game
Please Login
