
0
Owner's of the Razor Automobile Razor Automobile gave it a score of 0 out of 5. Here's how the scores stacked up:
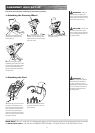
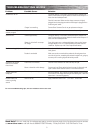

Turn power switch off before conducting any maintenance procedures.
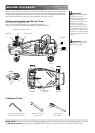
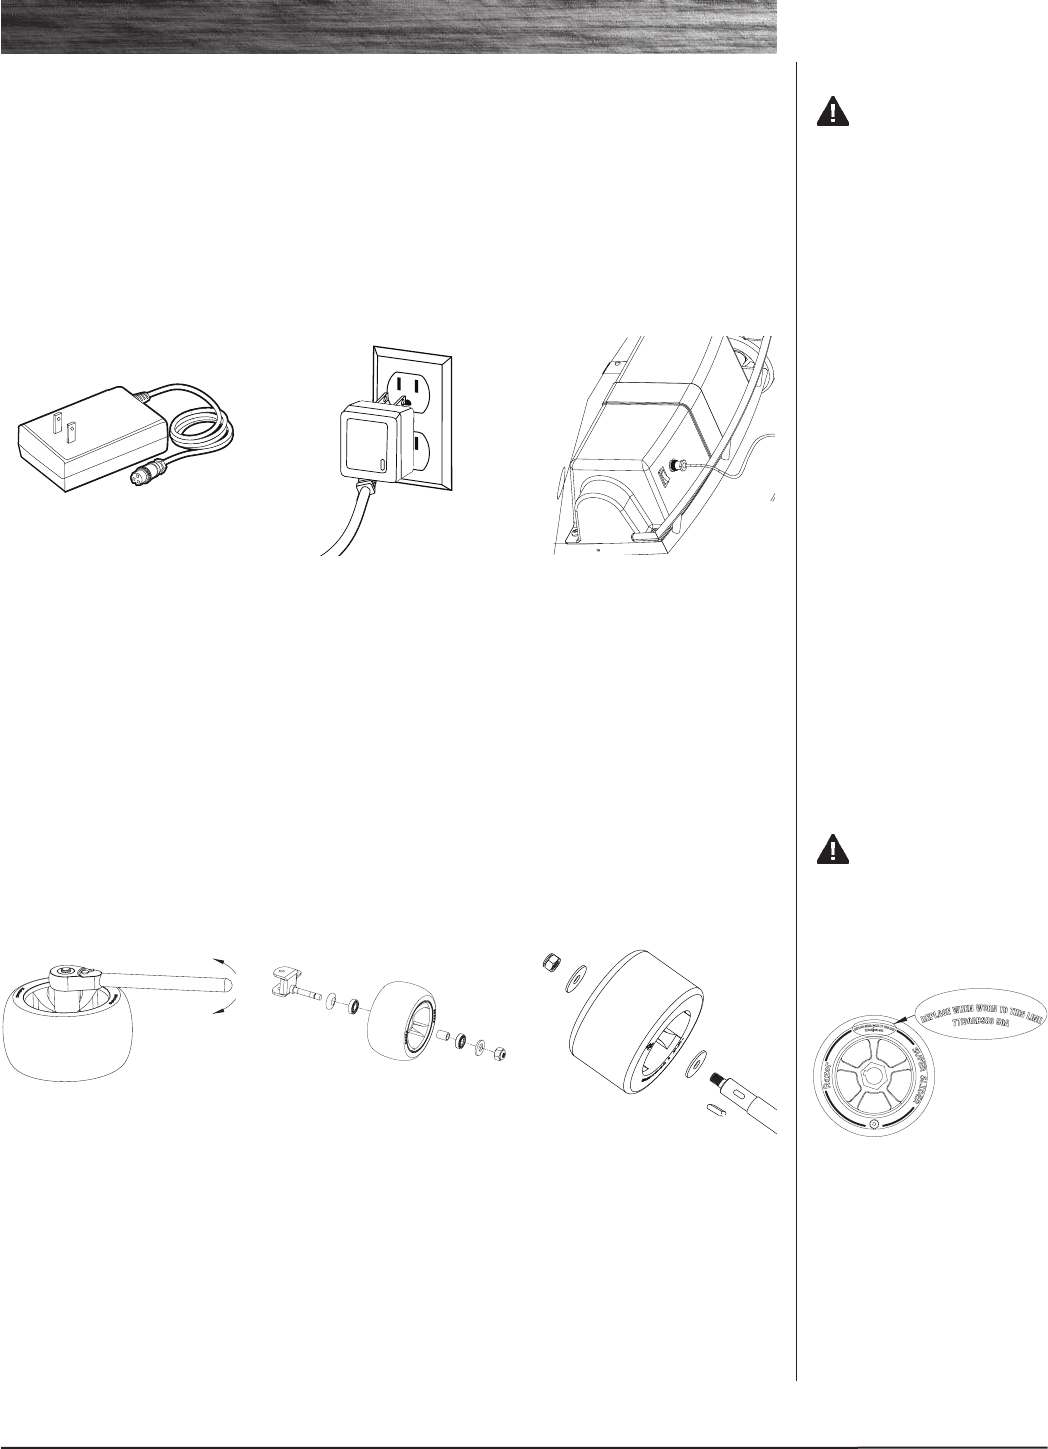
1 To remove a wheel, remove the
self-locking nut (13mm socket or
wrench required for front wheels,
17mm for the rear wheels). Tap the
wheel to remove.
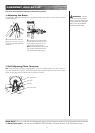
2 Front Wheel: To replace a
front wheel, make sure the bearings
are seated and the center spacer is
installed. Position the wheel with
the Razor logo facing outward.
Install the washer and tighten the
self-locking nut securely.
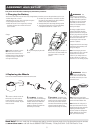
2 Rear Wheel: To replace a rear
wheel, make sure the key is properly
seated in the rear axle and aligned
with the key in the wheel. Position
the wheel with the Razor logo facing
outward. Install the washer and
tighten the self-locking nut securely.
5
ASSEMBLY AND SET-UP
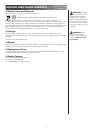
q Replacing the Wheels
WARNING: Failure to
properly adjust and tighten the
screws, nuts and bolts that affix
the wheels can cause you to lose
control and crash.
Note: The Ground Force Drifter
wheels must be replaced when worn
down to the wear indicator line.
Note: Practice drift riding only in
wide open areas clear from curbs,
parking blocks and other obstacles.
Impacting the wheels against
any hard surface can damage the
wheels. Wheels are not covered
under your limited warranty.
Need Help? Visit our web site for replacement parts, product support and a list of authorized service centers
at www.razor.com or call toll-free at 866-467-2967 Monday - Friday 8:00 AM - 5:00 PM Pacific Time.
Loosen
Tighten
Front and rear wheel installation and removal are the same.
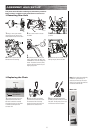
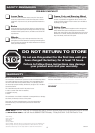
q Charging the Battery
Your Ground Force Drifter may not have a fully charged battery; therefore you must charge the battery prior to use.
2 Plug the charger into the port on
the Ground Force Drifter. Make sure
the power switch is in the “OFF”
position.
1 Plug the charger plug into wall
outlet.
Charger
WARNING: Use
ONLY with the recommended
charger. Batteries are only to be
charged under adult supervision.
The charger is not a toy. Always
disconnect your Ground Force
Drifter from the charger before
cleaning with liquid.
The charger supplied with the
Ground Force Drifter should be
regularly examined for damage to
the cord, plug, enclosure and other
parts. In the event of such damage,
the Ground Force Drifter must
not be charged until it has been
repaired or replaced.
Chargers have built-in over-charge
protection to prevent battery from
being over-charged.
Note: If the charger gets warm
during regular use, this is a normal
response and is no cause for
concern. If your charger does not
get warm during use, it does not
mean that it is not working properly.
• Initialchargetime:12hours
• Rechargetime:12hours,evenifthelightturnsgreen.
• Fullychargebatterybeforestoring.
• Whenthescooterisnotinregularuse,recharge
the battery at least once a month until normal
use is resumed.
• Runtime:Upto40minutesofcontinuousridetime.
Run time may vary depending on riding conditions,
climate and/or proper maintenance.
• Averagebatterylife:250charge/dischargecycles
• Toensurelongbatterylife,donotstorethebattery
in temperatures above 75° or below -10° F.
Note: Make sure power is turned
OFF when unit is not in use. If
the power switch is left on for an
extended period of time, the battery
may reach a stage at which it will
no longer hold a charge.
Charger


Find Your Products By Category
- Lawn and Garden
- Computer Equipment
- TV and Video
- Laundry Appliance
- Kitchen Appliance
- Car Audio and Video
- Automotive
- Photography
- Fitness & Sports
- Personal Care
- Communications
- Home Audio
- Portable Media
- Musical Instruments & Equipment
- Baby
- Household Appliance
- Cell Phone
- Marine Equipment
- Outdoor Cooking
- Power Tools
- Video Game
Please Login
