
0
Owner's of the Razor Mobility Scooter Razor Mobility Scooter gave it a score of 0 out of 5. Here's how the scores stacked up:

3
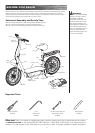
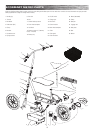
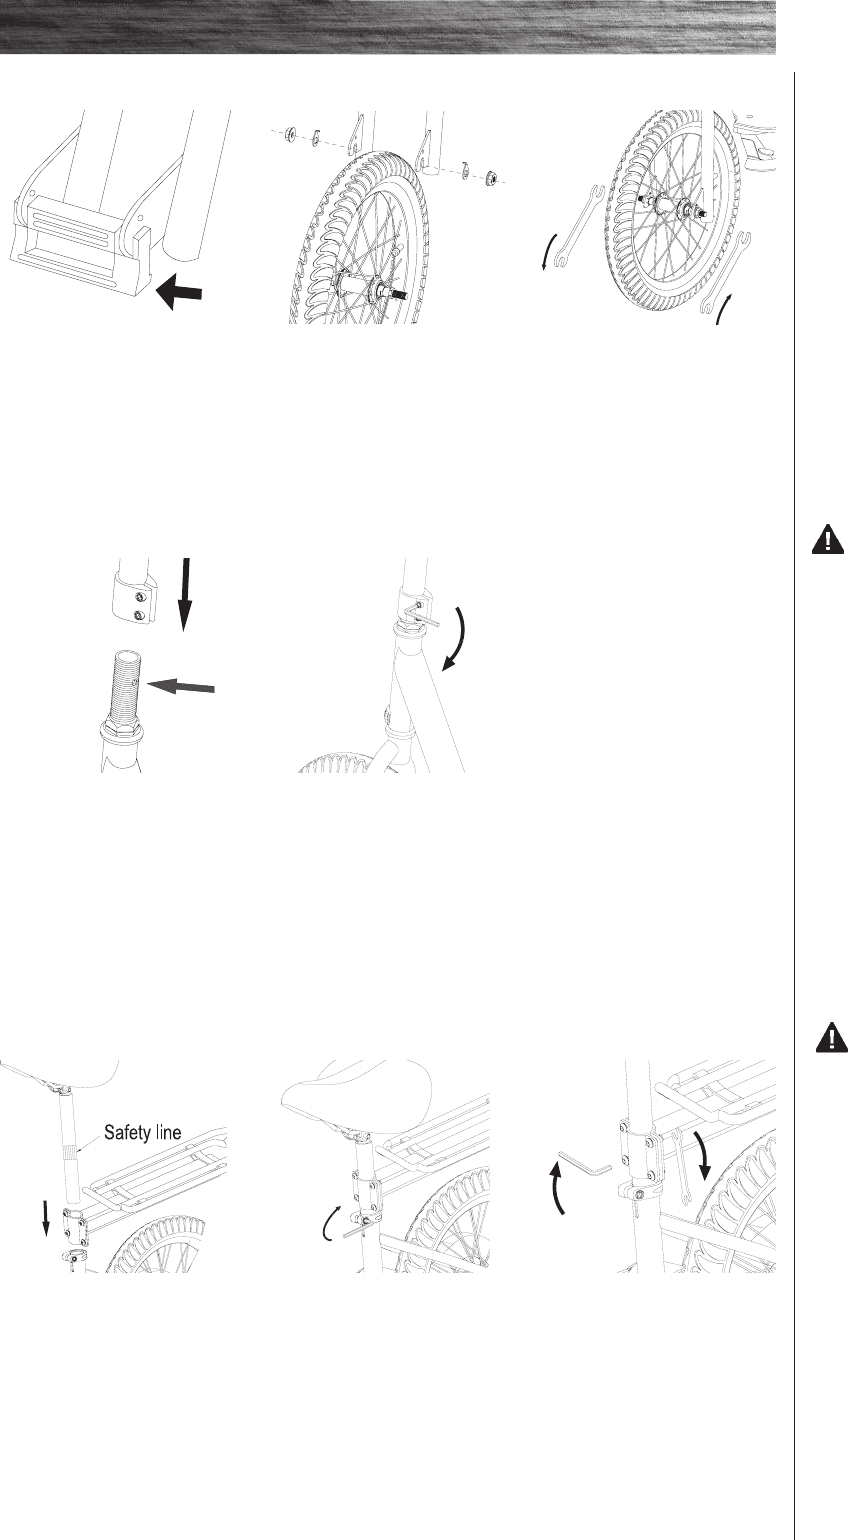
ASSEMBLY AND SET-UP
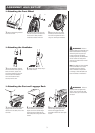
q Attaching the Front Wheel
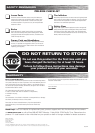
WARNING: Failure to
properly tighten the collar bolts may
allow the handlebars to dislodge
while riding and may cause you
to lose control and fall. When
correctly tightened, the handlebars
will not rotate out of alignment
with the front wheel under normal
circumstances.
Note: The cable and wire assembly
from the handlebar must not be
wrapped around the steering
tube or handlebar. Sharp bends
or twisting of the brake cable can
cause the brakes to malfunction.
1 Face the handlebars forward
with the throttle on the right and
brake on the left, depress the
push button located on the front
fork and insert the handlebar
stem until the button locks
securely into the stem.
2 Tighten the collar clamp using a
5mm Allen wrench.
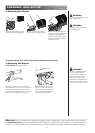
q Attaching the Handlebar
1 Remove the packing material
from the front fork.
2 Remove axle nuts (A) from the
axle bolt and insert the wheel into
the front fork. Safety washers
should face outside of the fork.
3 Insert the tab on the safety
washer (B) into the hole on the
front fork and tighten axle nuts
using two 15mm open wrenches.
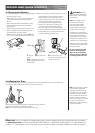
q Attaching the Seat and Luggage Rack
1
Slide the seat tube through the
luggage rack and into the frame
tube down to the safety line on the
seat tube.
2 The clamp of the luggage rack
should be above the seat clamp.
Adjust seat to the desired height.
Seure the seat by tightening the
collar clamp bolt using a 5mm Allen
wrench.
3 Adjust the luggage rack to the
desired height and tighten the 4
bolts on the luggage rack with
5mm Allen wrench and 10mm open
wrench.
WARNING: Failure to
properly install and tighten the
screws, nuts and bolts that affix
seat can cause you to lose control
and crash.
A
A
B
B


Find Your Products By Category
- Lawn and Garden
- Computer Equipment
- TV and Video
- Laundry Appliance
- Kitchen Appliance
- Car Audio and Video
- Automotive
- Photography
- Fitness & Sports
- Personal Care
- Communications
- Home Audio
- Portable Media
- Musical Instruments & Equipment
- Baby
- Household Appliance
- Cell Phone
- Marine Equipment
- Outdoor Cooking
- Power Tools
- Video Game
Please Login
