
0
Owner's of the Razor Mobility Scooter Razor Mobility Scooter gave it a score of 0 out of 5. Here's how the scores stacked up:

4
ASSEMBLY AND SET-UP
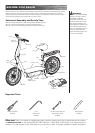
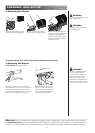
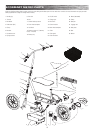
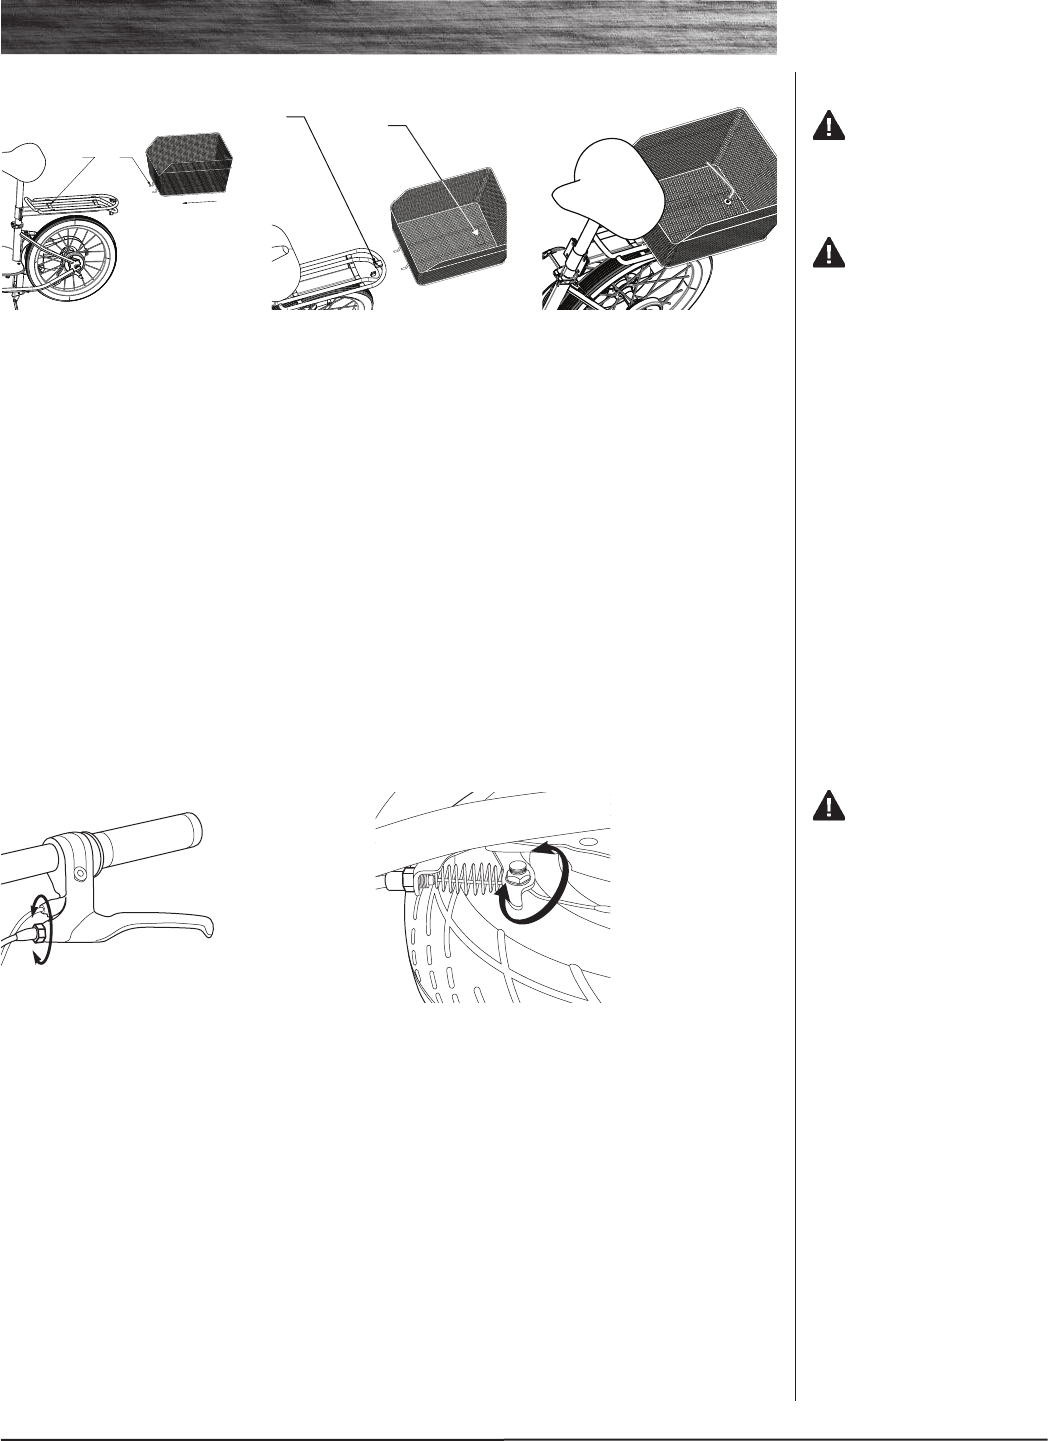
3 Insert the washer and bolt into
the hole in the basket and through
the bracket on the luggage rack.
Using a 5mm Allen wrench, tighten
the bolt until the basket is securely
attached to the rack.
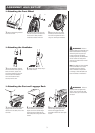
1 Slide the basket hooks (1) under
the bar located on the luggage rack.
2 Align the hole in the basket (2)
with the hole on the luggage rack (1).
Need Help? Visit our website for replacement parts, product support and a list of authorized service centers
at www.razor.com or call toll free 866-467-2967 Monday - Friday 8AM - 5PM Pacific Time. Please have the
product I.D. code located on the white label on your product or back of charger available for better assistance.
Turn power switch “OFF” before conducting any maintenance procedures.
WARNING:
The brake is capable of skidding
the rear tire and throwing an
unsuspecting rider. Practice in an
open area free from obstacles
until you are familiar with the
brake function. Avoid skidding to a
stop as this can cause you to lose
control and/or damage the rear tire.
WARNING:
Do not exceed weight limit of 11lbs
(5kg) on luggage rack.
WARNING:
The carrier should not be used to
carry people or pets.
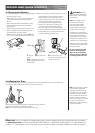
2 If the brake is too tight or too
loose, use a 10mm open wrench to
loosen the nut for additional adjust-
ment on the brake cable. Securely
tighten the nut when finished.
1 To adjust the brake cable play, thread the
brake lever adjuster in or out 1/4 to 1/2 turn until
the desired brake adjustment is attained. Most
adjustments are complete at this step. If brake still
needs further adjustment, proceed to step 2.
q Adjusting the Brakes
Tools required: 10mm open wrench
q Attaching the Basket
2
1
3
12


Find Your Products By Category
- Lawn and Garden
- Computer Equipment
- TV and Video
- Laundry Appliance
- Kitchen Appliance
- Car Audio and Video
- Automotive
- Photography
- Fitness & Sports
- Personal Care
- Communications
- Home Audio
- Portable Media
- Musical Instruments & Equipment
- Baby
- Household Appliance
- Cell Phone
- Marine Equipment
- Outdoor Cooking
- Power Tools
- Video Game
Please Login
