

4.3
Owner's of the Canon Digital Camera 9126B003 gave it a score of 4.3 out of 5. Here's how the scores stacked up:


120
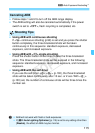
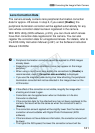
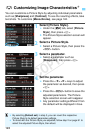
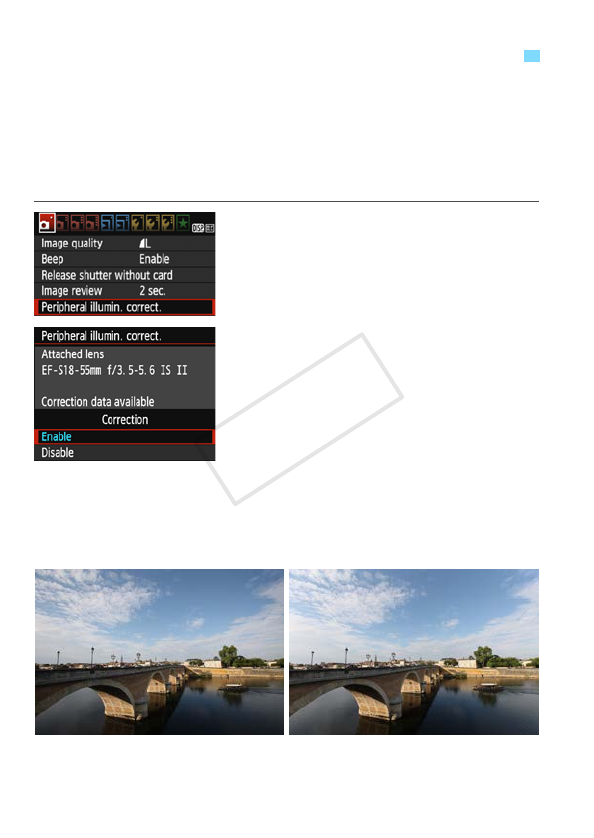
Due to the lens characteristics, the four corners of the picture may look
darker. This phenomenon is called lens light fall-off or drop in peripheral
illumination and can be corrected. The default setting is [Enable]. With
JPEG images, the correction is applied when the image is captured. For
RAW images, it can be corrected with Digital Photo Professional (EOS
software, p.318).
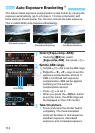
1
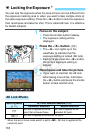
Select [Peripheral illumin.
correct.].
Under the [z1] tab, select
[Peripheral illumin. correct.], then
press <0>.
2
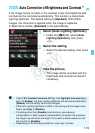
Select the setting.
Check that [Correction data
available] is displayed for the
attached lens.
If [Correction data not available] is
displayed, see “Lens Correction Data”
on the next page.
Select [Enable], then press <0>.
3
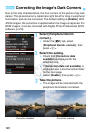
Take the picture.
The image will be recorded with the
peripheral illumination corrected.
3 Correcting the Image’s Dark Corners
Correction disabled Correction enabled
COPY


Find Your Products By Category
- Lawn and Garden
- Computer Equipment
- TV and Video
- Laundry Appliance
- Kitchen Appliance
- Car Audio and Video
- Automotive
- Photography
- Fitness & Sports
- Personal Care
- Communications
- Home Audio
- Portable Media
- Musical Instruments & Equipment
- Baby
- Household Appliance
- Cell Phone
- Marine Equipment
- Outdoor Cooking
- Power Tools
- Video Game
Please Login
