

4.3
Owner's of the Canon Digital Camera 9126B003 gave it a score of 4.3 out of 5. Here's how the scores stacked up:
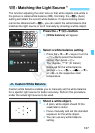


B: Matching the Light SourceN
128
2
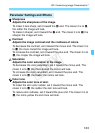
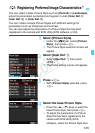
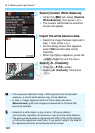
Select [Custom White Balance].
Under the [z2] tab, select [Custom
White Balance], then press <0>.
X The custom white balance selection
screen will appear.
3
Import the white balance data.
Select the image that was captured in
step 1, then press <0>.
X On the dialog screen that appears,
select [OK] and the data will be
imported.
When the menu reappears, press the
<M> button to exit the menu.
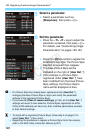
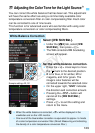
4
Select [O (Custom)].
Press the <
XB
> button.
Select [O (Custom)], then press
<0>.
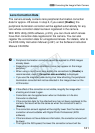
If the exposure obtained in step 1 differs greatly from the standard
exposure, a correct white balance may not be obtained.
In step 3, images captured while the Picture Style was set to
[Monochrome] (p.92) and images processed with a Creative filter
cannot be selected.
Instead of a white object, a gray chart or 18% gray reflector
(commercially available) can produce a more accurate white balance.
The personal white balance registered with EOS Utility (EOS software,
p.318) will be registered under [O]. If you perform step 3, the data for
the registered personal white balance will be erased.
COPY


Find Your Products By Category
- Lawn and Garden
- Computer Equipment
- TV and Video
- Laundry Appliance
- Kitchen Appliance
- Car Audio and Video
- Automotive
- Photography
- Fitness & Sports
- Personal Care
- Communications
- Home Audio
- Portable Media
- Musical Instruments & Equipment
- Baby
- Household Appliance
- Cell Phone
- Marine Equipment
- Outdoor Cooking
- Power Tools
- Video Game
Please Login
