

4.4
Owner's of the Canon Digital Camera 9543B001 gave it a score of 4.4 out of 5. Here's how the scores stacked up:


106
Before Use
Basic Guide
Advanced Guide
1
Camera Basics
2
Auto Mode /
Hybrid Auto Mode
3
Other Shooting Modes
5
Tv, Av, M, C1, and C2 Mode
6
Playback Mode
7
Wi-Fi Functions
8
Setting Menu
9
Accessories
10
Appendix
Index
4
P Mode
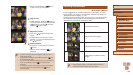
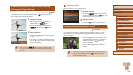
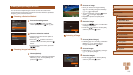
Using the Front Dial to Jump between Images
Jump to Favorites
Displays images tagged as favorites (
=
115).
Jump Shot Date
Jumps to the rst image in each group of
images that were shot on the same date.
Jump 10 Images
Jumps by 10 images at a time.
Jump 100 Images
Jumps by 100 images at a time.
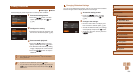
1
Choose a condition.
● Choose a condition (or jump method)
in single-image display by turning the
[ ] dial and then pressing the [ ][ ]
buttons.
2
View images matching your
specied condition, or jump by the
specied amount.
● Turn the [ ] dial to view only images
matching the condition or jump by the
specied number of images forward or
back.
● Turning the [ ] dial when browsing images in index display
will jump to the previous or next image according to the jump
method chosen in single-image display. However, if you have
chosen [
] or [ ], the jump method will be switched to [ ].
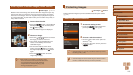
3
Choose the second condition and
check the images found.
● To switch to ltered image display, press
the [ ] button and go to step 4.
● When you have selected [
] as the rst
condition, press the [ ] button, and press
the [ ][ ][ ][ ] buttons on the next
screen to choose a person.
4
View the ltered images.
● Images matching your conditions are
displayed in yellow frames. To view only
these images, press the [ ][ ] buttons.
● To cancel ltered display, press the [
]
button.
● When the camera has found no corresponding images for some
conditions, those conditions will not be available. Note that [
] is
not available unless people are registered (
=
47).
● To show or hide information, press the [ ] button in step 3.
● Options for viewing the images found (in step 3) include
“Navigating through Images in an Index” (
=
105), “Magnifying
Images” (
=
108), and “Viewing Slideshows” (
=
109). You can
also apply image operations to all images found, by choosing
[Protect All Images in Search] in “Protecting Images” (
=
110) or
[Select All Images in Search] in “Erasing Multiple Images at Once”
(
=
113), “Adding Images to the Print List (DPOF)” (
=
170), or
“Adding Images to a Photobook” (
=
172).
● If you edit images and save them as new images (
=
116 –
=
120), a message is displayed, and the images that were
found are no longer shown.


Find Your Products By Category
- Lawn and Garden
- Computer Equipment
- TV and Video
- Laundry Appliance
- Kitchen Appliance
- Car Audio and Video
- Automotive
- Photography
- Fitness & Sports
- Personal Care
- Communications
- Home Audio
- Portable Media
- Musical Instruments & Equipment
- Baby
- Household Appliance
- Cell Phone
- Marine Equipment
- Outdoor Cooking
- Power Tools
- Video Game
Please Login
