
4.4
Owner's of the Canon Digital Camera 9543B001 gave it a score of 4.4 out of 5. Here's how the scores stacked up:


21
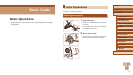
Before Use
Basic Guide
Advanced Guide
1
Camera Basics
2
Auto Mode /
Hybrid Auto Mode
3
Other Shooting Modes
5
Tv, Av, M, C1, and C2 Mode
6
Playback Mode
7
Wi-Fi Functions
8
Setting Menu
9
Accessories
10
Appendix
Index
4
P Mode
● Date/time settings can be retained for about 3 weeks by the
camera’s built-in date/time battery (backup battery) after the
battery pack is removed.
● The date/time battery will be charged in about 4 hours once you
insert a charged battery pack or connect the camera to an AC
adapter kit (sold separately,
=
155), even if the camera is left
off.
● Once the date/time battery is depleted, the [Date/Time] screen will
be displayed when you turn the camera on. Set the correct date
and time as described in “Setting the Date and Time” (
=
20).
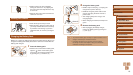
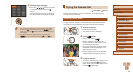
Display Language
Change the display language as needed.
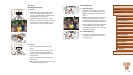
1
Enter Playback mode.
● Press the [ ] button.
2
Access the setting screen.
● Press and hold the [ ] button, and then
immediately press the [ ] button.
● Unless you set the date, time, and home time zone, the [Date/
Time] screen will be displayed each time you turn the camera on.
Specify the correct information.
● To set daylight saving time (1 hour ahead), choose [ ] in step 2
and then choose [
] by pressing the [ ][ ] buttons.
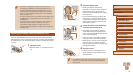
Changing the Date and Time
Adjust the date and time as follows.
1
Access the menu screen.
● Press the [ ] button.
2
Choose [Date/Time].
● Move the zoom lever to choose the [ ]
tab.
● Press the [
][ ] buttons to choose
[Date/Time], and then press the [ ]
button.
3
Change the date and time.
● Follow step 2 in “Setting the Date and
Time” (
=
20) to adjust the settings.
● Press the [
] button to close the
menu screen.


Find Your Products By Category
- Lawn and Garden
- Computer Equipment
- TV and Video
- Laundry Appliance
- Kitchen Appliance
- Car Audio and Video
- Automotive
- Photography
- Fitness & Sports
- Personal Care
- Communications
- Home Audio
- Portable Media
- Musical Instruments & Equipment
- Baby
- Household Appliance
- Cell Phone
- Marine Equipment
- Outdoor Cooking
- Power Tools
- Video Game
Please Login
