
4.4
Owner's of the Canon Digital Camera 9543B001 gave it a score of 4.4 out of 5. Here's how the scores stacked up:


73
Before Use
Basic Guide
Advanced Guide
1
Camera Basics
2
Auto Mode /
Hybrid Auto Mode
3
Other Shooting Modes
5
Tv, Av, M, C1, and C2 Mode
6
Playback Mode
7
Wi-Fi Functions
8
Setting Menu
9
Accessories
10
Appendix
Index
4
P Mode
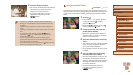
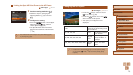
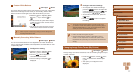
Changing the ISO Speed
Still Images
Movies
● Press the [ ] button, and then choose
[ ] in the menu (
=
29).
● Press the [
][ ] buttons or turn the [ ]
dial to choose an ISO speed.
● The option you congured is now
displayed.
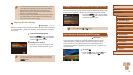
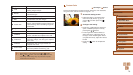
AUTO
Automatically adjusts the ISO
speed to suit the shooting mode
and conditions.
100, 125, 160, 200 Low
For shooting outdoors
in fair weather.
250, 320, 400, 500, 640, 800
Slightly
Low
For shooting in
cloudy conditions, or
at twilight.
1000, 1250, 1600, 2000, 2500, 3200
Slightly
High
For shooting night
scenes, or in dark
rooms.
● If motion blur is not reduced enough at an ISO speed of [3200],
you can specify [
] mode (
=
59) and choose [4000], [5000],
or [6400].
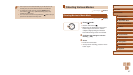
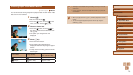
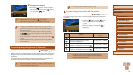
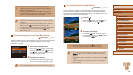
Linking the Spot AE Point Frame to the AF Frame
Still Images
Movies
1
Set the metering method to [ ].
● Follow the steps in “Changing the
Metering Method” (
=
72) to choose
[ ].
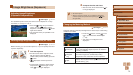
2
Congure the setting.
● Press the [ ] button, choose [Spot
AE Point] on the [ ] tab, and then
choose [AF Point] (
=
30).
● The Spot AE Point frame will now be
linked to the movement of the AF frame
(
=
82).
● Not available when [AF Frame] is set to [Face Detect] (
=
83)
or [Tracking AF] (
=
83).


Find Your Products By Category
- Lawn and Garden
- Computer Equipment
- TV and Video
- Laundry Appliance
- Kitchen Appliance
- Car Audio and Video
- Automotive
- Photography
- Fitness & Sports
- Personal Care
- Communications
- Home Audio
- Portable Media
- Musical Instruments & Equipment
- Baby
- Household Appliance
- Cell Phone
- Marine Equipment
- Outdoor Cooking
- Power Tools
- Video Game
Please Login
