
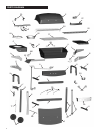
0
Owner's of the Char-Broil Gas Grill Char-Broil Gas Grill gave it a score of 0 out of 5. Here's how the scores stacked up:
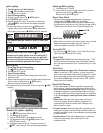
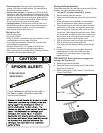
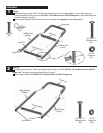
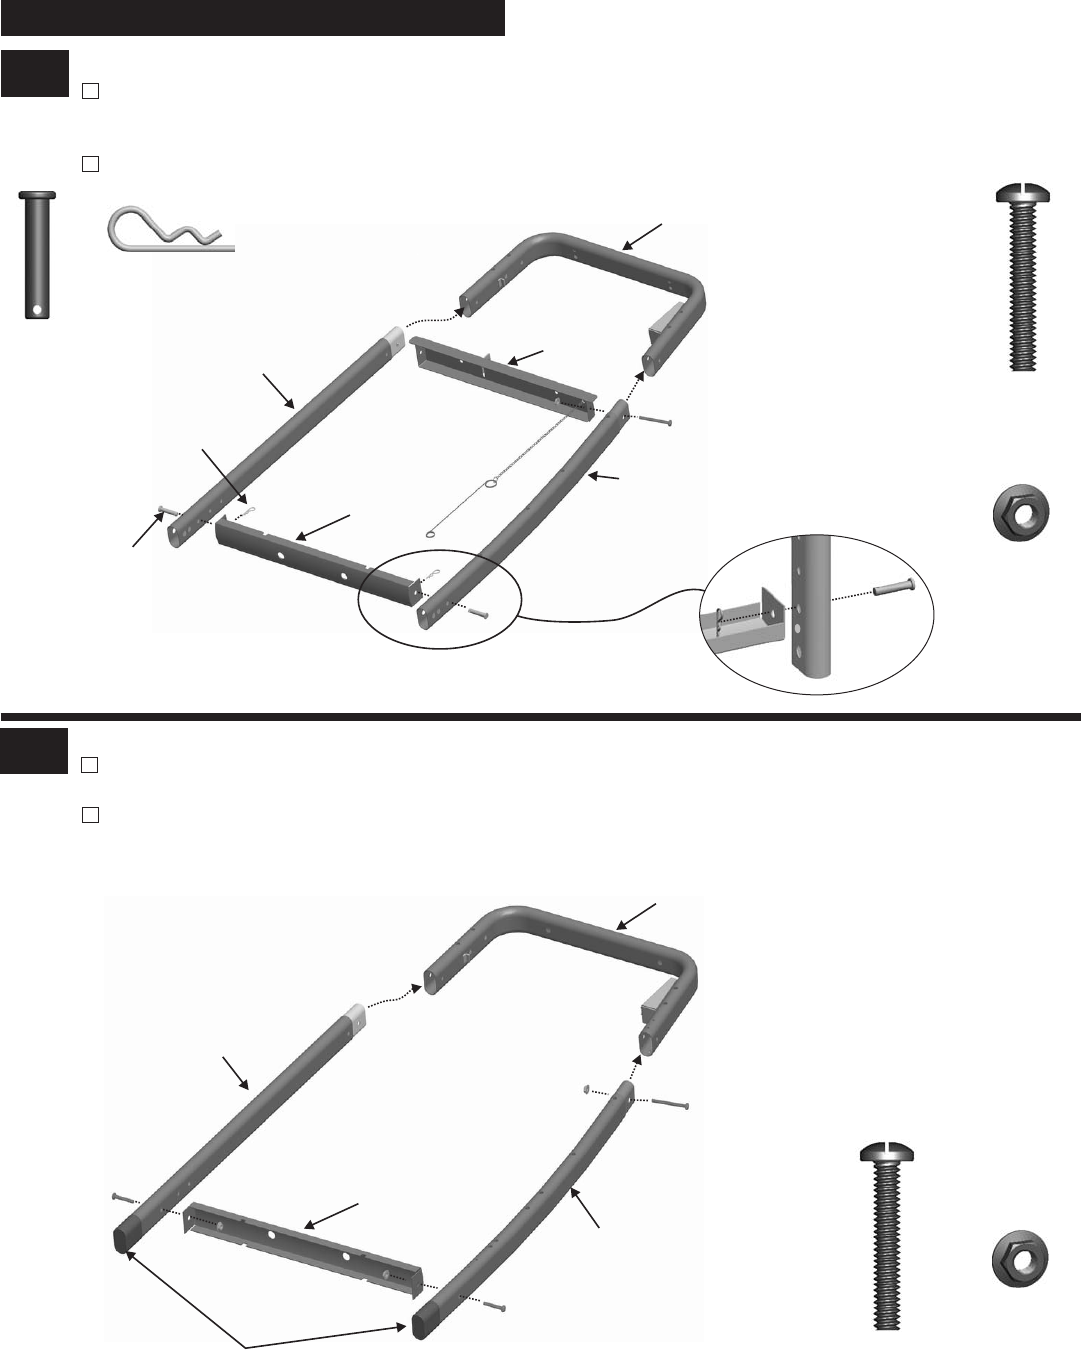
ASSEMBLY
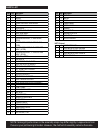
17
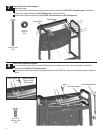
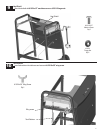
1
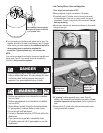
Left leg
Place upper leg as shown. NOTE: Left front and left back legs do not have leg extenders. In front, attach upper leg,
side brace and left front leg (curve) with #10-24x1-1/4’’ machine screw and #10-24 flange nut. In back, attached the left
back leg (straight) to upper leg.
Attach support bracket in the third hole from bottom of leg with two hinge pins and two hitch pins (A) .
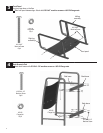
Right leg
Place upper leg as shown. Attach upper leg and right front leg (curve) with #10-24x1-1/4’’ machine screws and #10-24
flange nuts. Then attach upper leg and right back leg (straight).
Attach support bracket with #10-24x1-1/4’’ machine screws and #10-24 flange nuts.
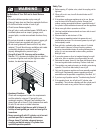
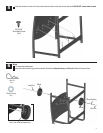
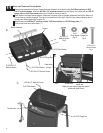
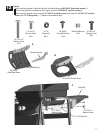
2
Hitch Pin
Qty.2
Hinge Pin
Qty.2
#10-24x1-1/4’’
Machine Screw
Qty.1
#10-24
Flange Nut
Qty. 1
#10-24x1-1/4’’
Machine Screw
Qty.3
#10-24
Flange Nut
Qty. 3
Left Front Leg
(Curve)
Support Bracket
Left Back Leg
(Straight)
Side Brace
Upper Leg
Right Front Leg
(Curve)
Right Back Leg
(Straight)
Support Bracket
Leg Extender
Upper Leg
Hinge Pin
Hitch Pin
A


Find Your Products By Category
- Lawn and Garden
- Computer Equipment
- TV and Video
- Laundry Appliance
- Kitchen Appliance
- Car Audio and Video
- Automotive
- Photography
- Fitness & Sports
- Personal Care
- Communications
- Home Audio
- Portable Media
- Musical Instruments & Equipment
- Baby
- Household Appliance
- Cell Phone
- Marine Equipment
- Outdoor Cooking
- Power Tools
- Video Game
Please Login
