
0
Owner's of the Brother Sewing Machine Computerized Embroidery Machine gave it a score of 0 out of 5. Here's how the scores stacked up:


8
— — — — — — — — — — — — — — — — — — — — — — — — — — — — — — — — — — — — — — — — — — — — — — — — — — —
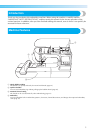
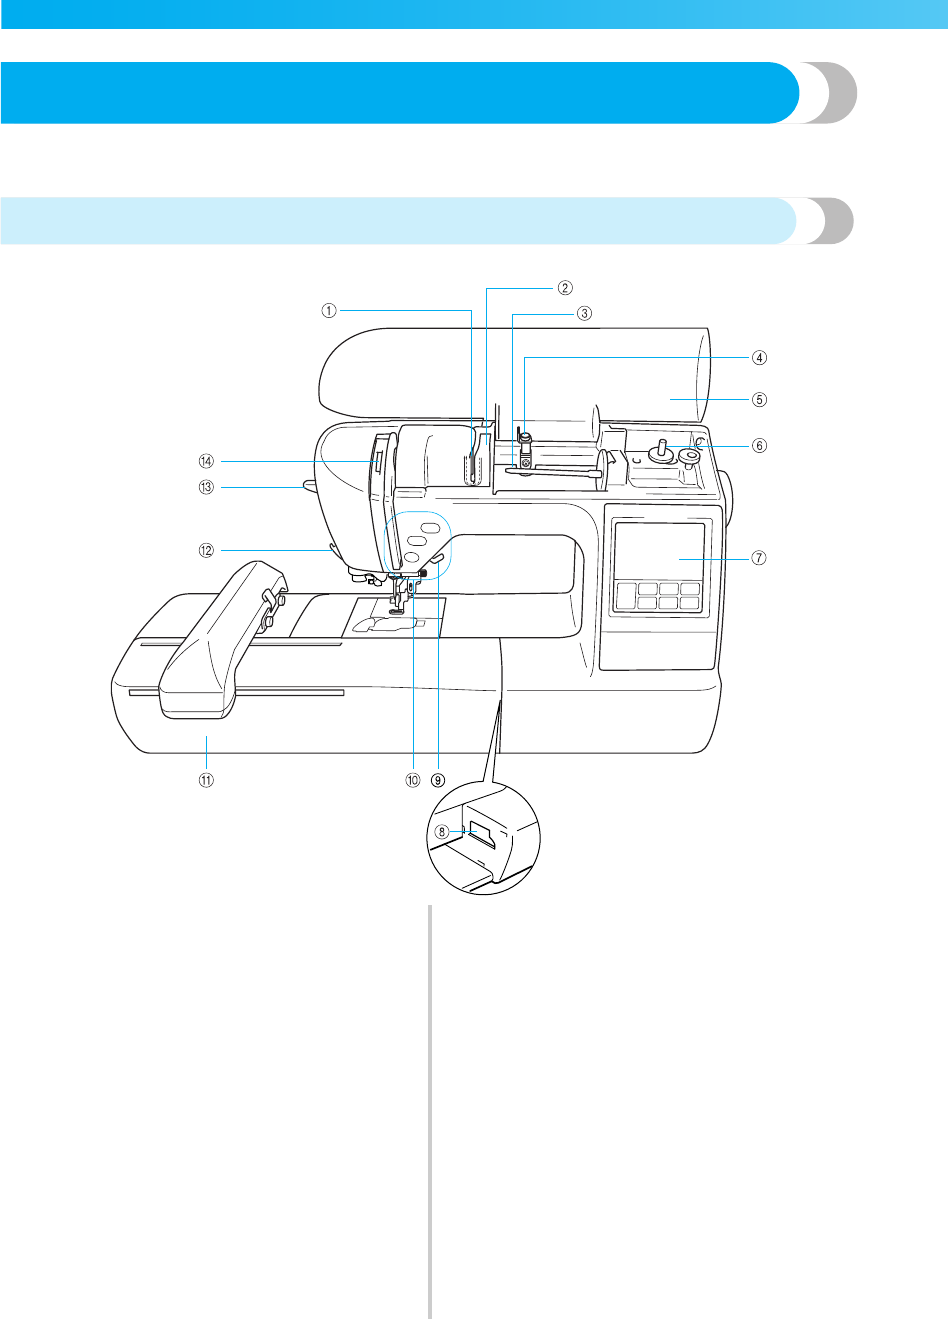
Names of Machine Parts and Their Functions
The names of the various parts of the machine and their functions are described below. Before using the
machine, carefully read these descriptions to learn the names of the machine parts.
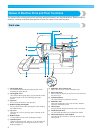
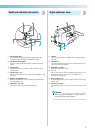
Front view
a Thread guide plate
Pass the thread around the thread guide plate when
threading the upper thread.
b Thread guide cover
Like with the thread guide plate, pass the thread around
the thread guide cover when threading the upper
thread.
c Spool pin
Place a spool of thread on the spool pin.
d Bobbin winding thread guide
Pass the thread around this thread guide when winding
the bobbin thread.
e Top cover
Open the top cover to place the spool of thread on the
spool pin.
f Bobbin winder
Use the bobbin winder when winding the bobbin.
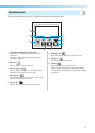
g Operation panel
From the operation panel, patterns can be selected and
edited, and operations for using the machine can be
displayed (page 11).
h Embroidery unit connector slot
Plug in the connector for the embroidery unit.
i Presser foot lever
Raise and lower the presser foot lever to raise and lower
the presser foot
j Operation buttons
Use these buttons to operate the machine.
k Embroidery unit
Attach the embroidery unit to the machine, and then
attach the embroidery frame.
l Thread cutter
Pass the threads through the thread cutter to cut them.
m Needle threader lever
Use the needle threader lever to thread the needle.
n Thread take-up lever check window
Look through the window to check the position of the
take-up lever.


Find Your Products By Category
- Lawn and Garden
- Computer Equipment
- TV and Video
- Laundry Appliance
- Kitchen Appliance
- Car Audio and Video
- Automotive
- Photography
- Fitness & Sports
- Personal Care
- Communications
- Home Audio
- Portable Media
- Musical Instruments & Equipment
- Baby
- Household Appliance
- Cell Phone
- Marine Equipment
- Outdoor Cooking
- Power Tools
- Video Game
Please Login
