

0
Owner's of the Brother Sewing Machine Computerized Embroidery Machine gave it a score of 0 out of 5. Here's how the scores stacked up:


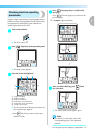
Winding/Installing the Bobbin 25
1
— — — — — — — — — — — — — — — — — — — — — — — — — — — — — — — — — — — — — — — — — — — — — — — — — — — —
f
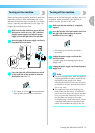
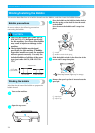
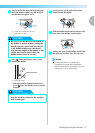
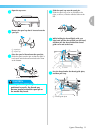
Place the spool of thread for the bobbin onto
the spool pin.
Slide the spool onto the pin so that the spool is
horizontal and the thread unwinds to the front at the
bottom.
• If the spool is not positioned so that the
thread unwinds correctly, the thread may
become tangled around the spool pin.
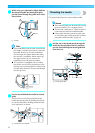
g
Slide the spool cap onto the spool pin.
Slide the spool cap as far as possible to the right, as
shown, with the rounded side on the left.
CAUTION
Memo
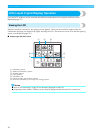
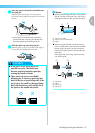
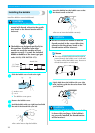
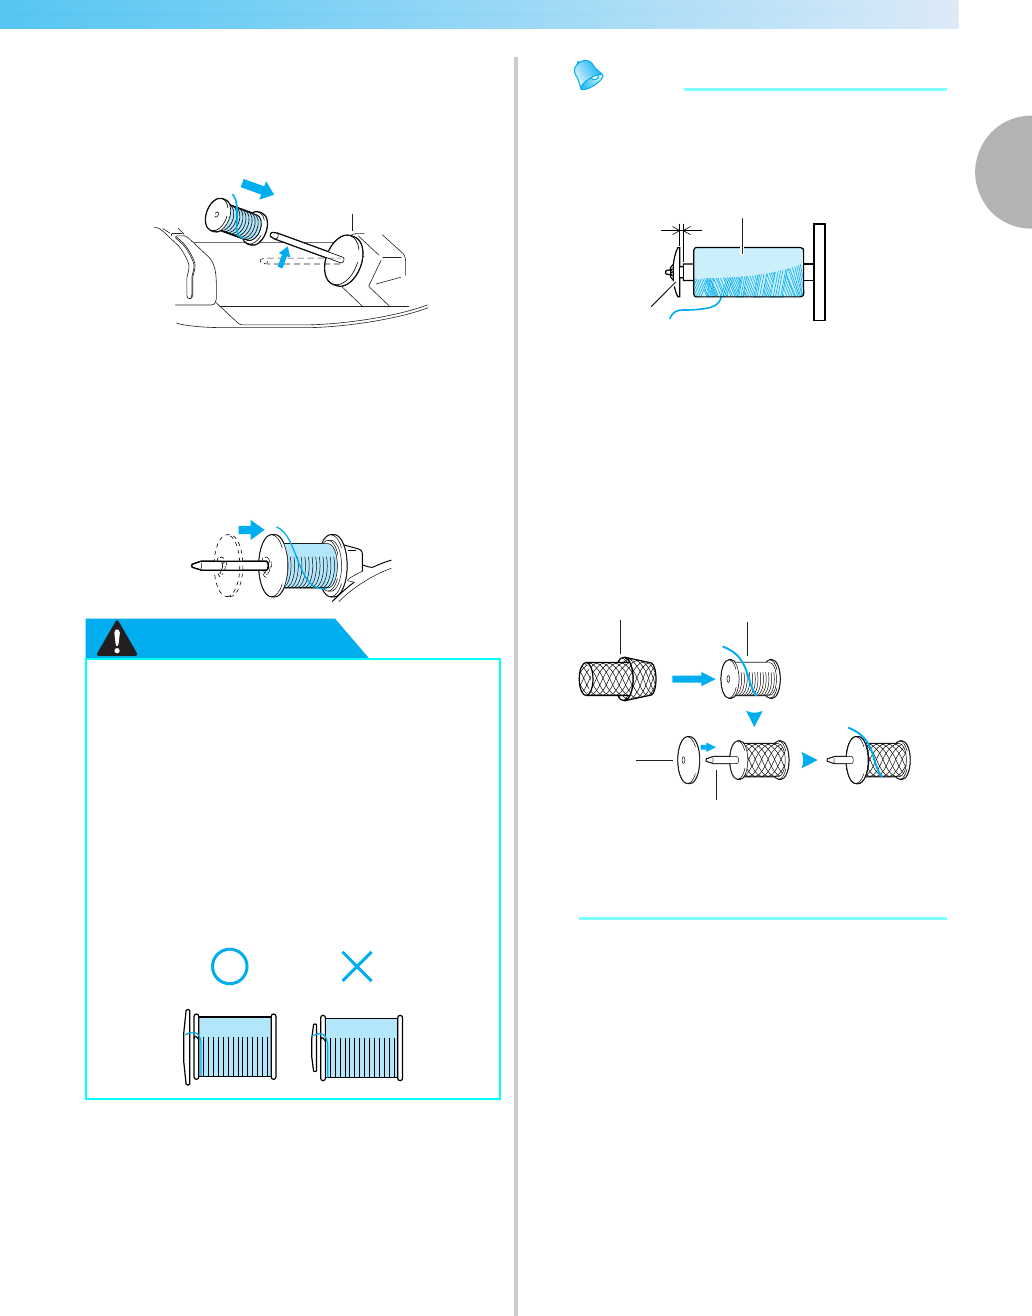
z When embroidering with fine, cross-wound
thread, use the small spool cap, and leave a
small space between the cap and the spool.
a Spool cap (small)
b Spool (cross-wound thread)
c Space
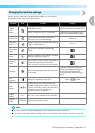
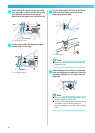
z When using thread that winds off quickly,
such as transparent nylon thread or metallic
thread, place the spool net over the spool
before placing the spool of thread onto the
spool pin.
If the spool net is too long, fold it to fit the
size of the spool.
a Spool net
b Spool
c Spool cap
d Spool pin
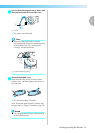
● If the spool or the spool cap is not
installed correctly, the thread may
become tangled around the spool pin,
causing the needle to break.
● Three spool cap sizes are available,
allowing you to choose a spool cap that
best fits the size of spool being used. If the
spool cap is too small for the spool being
used, the thread may catch on the slit in
the spool or the needle may break.
●
a
c
b
2
1
4
3


Find Your Products By Category
- Lawn and Garden
- Computer Equipment
- TV and Video
- Laundry Appliance
- Kitchen Appliance
- Car Audio and Video
- Automotive
- Photography
- Fitness & Sports
- Personal Care
- Communications
- Home Audio
- Portable Media
- Musical Instruments & Equipment
- Baby
- Household Appliance
- Cell Phone
- Marine Equipment
- Outdoor Cooking
- Power Tools
- Video Game
Please Login
