
0
Owner's of the Brother Sewing Machine Computerized Embroidery Machine gave it a score of 0 out of 5. Here's how the scores stacked up:


72
APPENDIX — — — — — — — — — — — — — — — — — — — — — — — — — — — — — — — — — — — — — — — — — — — — — —
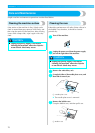
Attaching the Embroidery Foot
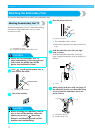
This section describes how to attach the embroidery foot.
Attaching the embroidery Foot “Q”
Attach the embroidery foot “Q” when embroidering.
Have the included embroidery foot “Q” and a
screwdriver ready.
a Embroidery foot bar
b Caught by the presser foot holder screw
CAUTION
a
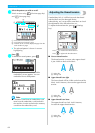
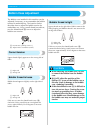
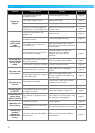
Press (Needle position button) once or
twice to raise the needle.
a Needle position button
b
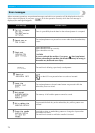
Turn off the machine.
CAUTION
c
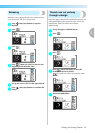
Raise the presser foot lever.
a Presser foot lever
X The embroidery foot is raised.
• At the time of purchase, the presser foot lever
is up.
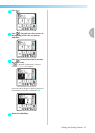
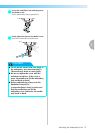
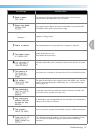
d
Hold the embroidery foot with your right
hand, as shown.
Hold the embroidery foot with your index
finger wrapped around the lever at the back of
the foot.
a Lever
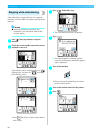
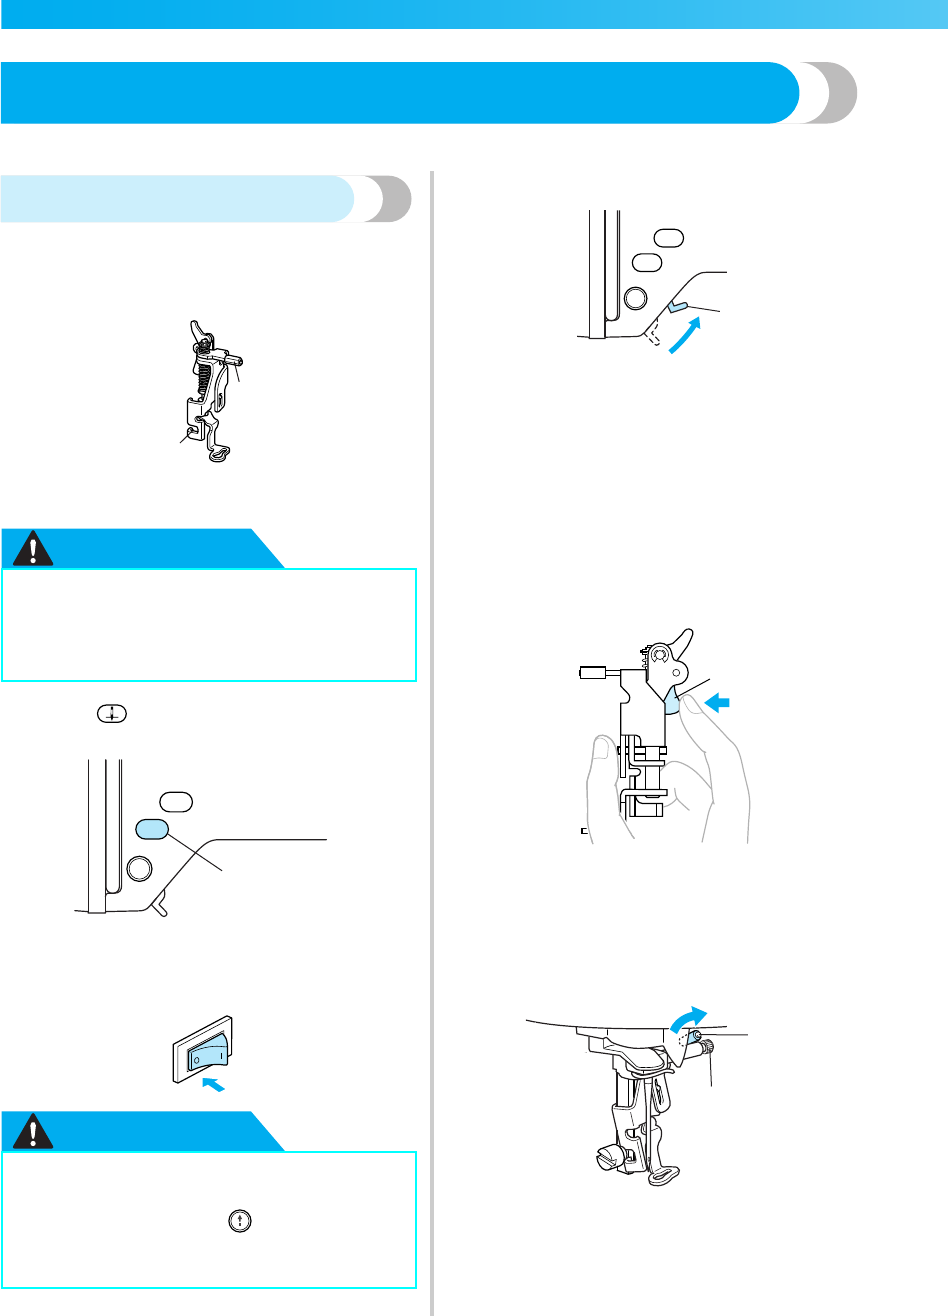
e
While pressing in the lever with your finger, fit
the embroidery foot bar over the needle clamp
screw to attach the embroidery foot to the
presser foot bar.
a Embroidery foot bar
b Needle clamp screw
● Always use the embroidery foot “Q”
when embroidering. If the wrong presser
foot is used, the needle may hit the
presser foot and break or bend.
● Before attaching the embroidery foot, be
sure to turn off the machine, otherwise
injuries may occur if (Start/stop
button) is accidentally pressed and the
machine starts embroidering.
2
1
1
a
a
1
2


Find Your Products By Category
- Lawn and Garden
- Computer Equipment
- TV and Video
- Laundry Appliance
- Kitchen Appliance
- Car Audio and Video
- Automotive
- Photography
- Fitness & Sports
- Personal Care
- Communications
- Home Audio
- Portable Media
- Musical Instruments & Equipment
- Baby
- Household Appliance
- Cell Phone
- Marine Equipment
- Outdoor Cooking
- Power Tools
- Video Game
Please Login
