
0
Owner's of the Canon Digital Camera 9169B001 gave it a score of 0 out of 5. Here's how the scores stacked up:


133
Before Use
Basic Guide
Advanced Guide
Camera Basics
Auto Mode
Other Shooting
Modes
P Mode
Playback Mode
Wi-Fi Functions
Setting Menu
Accessories
Appendix
Index
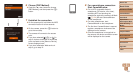
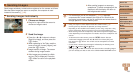
Hybrid Auto /
Dual Capture Mode
12
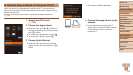
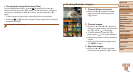
Send or print the images.
The screen displayed when the devices
are connected varies depending on the
target device.
When the camera is connected to a
smartphone or Web service, an image
transfer screen is displayed.
For instructions on sending images, see
“Sending Images” (=
139).
When the camera is connected to a
computer, the camera screen is blank.
Follow the steps in “Saving Images to a
Computer” (=
142) to save images to
the computer.
When the camera is connected to a
printer, you can print by following the
same steps as for printing via USB. For
details, see “Printing Images” (=
171).
•All images in the camera can be viewed from the connected
smartphone when you choose [Yes] in step 11. To keep camera
images private, so that they cannot be viewed from the smartphone,
choose [No] in step 11.
•To change privacy settings for smartphones added to the list,
choose the smartphone whose settings you want to change from
[Edit a Device] in step 4, and then choose [View Settings].
• If you chose [PIN Method] in step 6, a PIN code will be displayed on the
screen. Be sure to set this code in the access point. Choose a device in the
[Select a Device] screen. For further details, refer to the user manual included
with your access point.
• To add multiple destinations, repeat this procedure from the rst step.
• Once you have assigned a connection destination to Touch Actions (=
106),
you can prepare the camera to reconnect to the destination simply by dragging
across the screen with the assigned gesture.
Previous Access Points
You can reconnect to any previous access points automatically by following
step 4 in “Connecting to WPS-Compatible Access Points” (=
130).
• To reconnect to the access point, conrm that the target device is already
connected to it, and then follow the procedure from step 9. Note that this
step is not required when connecting to Web services.
• To switch access points, choose [Switch Network] on the screen
displayed when you establish a connection, and then follow the
procedure from step 5.


Find Your Products By Category
- Lawn and Garden
- Computer Equipment
- TV and Video
- Laundry Appliance
- Kitchen Appliance
- Car Audio and Video
- Automotive
- Photography
- Fitness & Sports
- Personal Care
- Communications
- Home Audio
- Portable Media
- Musical Instruments & Equipment
- Baby
- Household Appliance
- Cell Phone
- Marine Equipment
- Outdoor Cooking
- Power Tools
- Video Game
Please Login
