
0
Owner's of the Canon Digital Camera 9169B001 gave it a score of 0 out of 5. Here's how the scores stacked up:


15
Before Use
Basic Guide
Advanced Guide
Camera Basics
Auto Mode
Other Shooting
Modes
P Mode
Playback Mode
Wi-Fi Functions
Setting Menu
Accessories
Appendix
Index
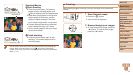
Hybrid Auto /
Dual Capture Mode
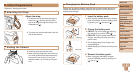
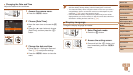
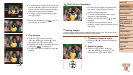
Setting the Date and Time
Set the current date and time correctly as follows if the [Date/Time] screen
is displayed when you turn the camera on. Information you specify this way
is recorded in image properties when you shoot, and it is used when you
manage images by shooting date or print images showing the date.
You can also add a date stamp to shots, if you wish (=
39).
1 Turn the camera on.
Press the power button.
The [Date/Time] screen is displayed.
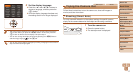
2 Set the date and time.
Press the <q><r> buttons to choose an
option.
Press the <o><p> buttons to specify
the date and time.
When nished, press the <m> button.
3 Set the home time zone.
Press the <q><r> buttons to choose
your home time zone.
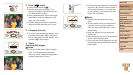
4 Finish the setup process.
Press the <m> button when nished.
After a conrmation message, the setting
screen is no longer displayed.
To turn off the camera, press the power
button.
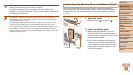
•Unless you set the date, time, and home time zone, the [Date/Time]
screen will be displayed each time you turn the camera on. Specify
the correct information.
• To set daylight saving time (1 hour ahead), choose [ ] in step 2 and then
choose [
] by pressing the <o><p> buttons.
• You can also set the date and time by touching the desired option on the
screen in step 2 and then touching [o][p], followed by [
]. Similarly, you
can also set your home time zone by touching [q][r] on the screen in step 3,
followed by [
].


Find Your Products By Category
- Lawn and Garden
- Computer Equipment
- TV and Video
- Laundry Appliance
- Kitchen Appliance
- Car Audio and Video
- Automotive
- Photography
- Fitness & Sports
- Personal Care
- Communications
- Home Audio
- Portable Media
- Musical Instruments & Equipment
- Baby
- Household Appliance
- Cell Phone
- Marine Equipment
- Outdoor Cooking
- Power Tools
- Video Game
Please Login
