
0
Owner's of the Brother Sewing Machine PC-420PRW gave it a score of 0 out of 5. Here's how the scores stacked up:

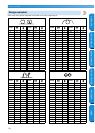
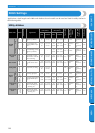
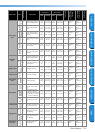
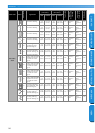
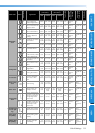
UTILITY STITCHES —————————————————————————————————————————————————
—
124
GETTING READYCONTENTS SEWING BASICS UTILITY STITCHES APPENDIX INDEX
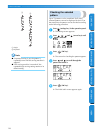
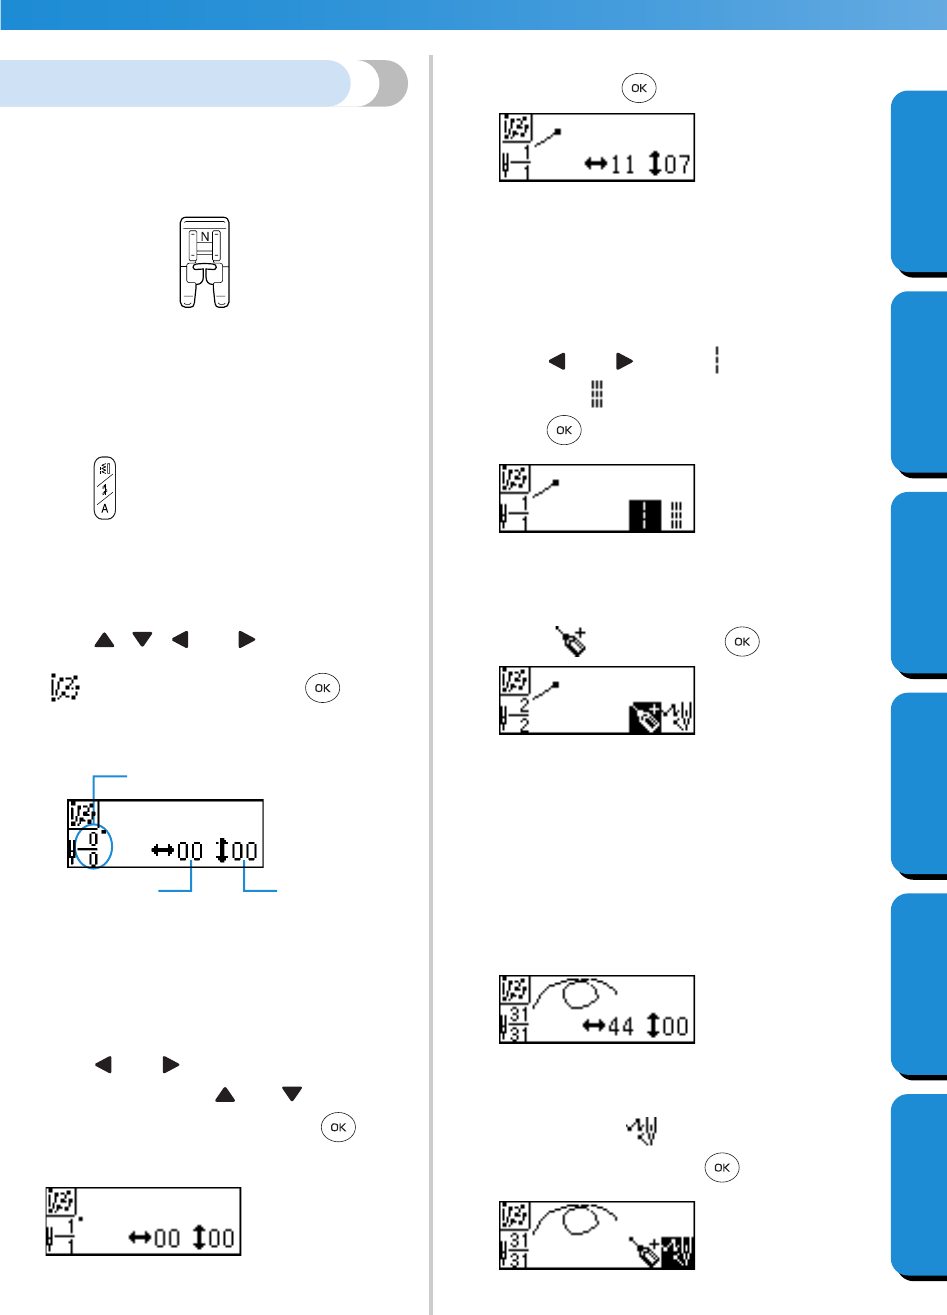
Entering the pattern data
Follow the pattern drawn on the grid sheet and
program the pattern into the sewing machine.
1
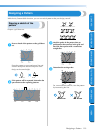
Attach monogramming foot “N”.
• For details, refer to “Replacing the presser
foot” (page 37).
2
Turn on the sewing machine.
3
Press (stitch selection key) in the
operation panel.
X The screen containing the various types of
stitches appears.
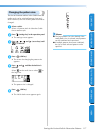
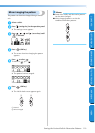
4
Press , , and (arrow keys) until
is selected, and then press (OK
key).
X The screen for entering a pattern appears.
1 Number of the current point/Total number of
points
2 Horizontal coordinate (0–75)
3 Vertical coordinate (0–14)
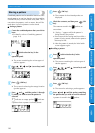
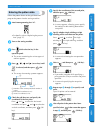
5
Check the grid sheet set, and specify the
coordinates of the first point.
Press and to select the horizontal
coordinate and press and to select the
vertical coordinate, and then press (OK
key).
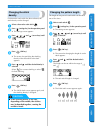
6
Specify the coordinates of the second point,
and then press (OK key).
X A screen appears, allowing you to specify
the settings for the stitching between the
two points.
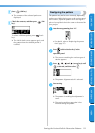
7
Specify whether single stitching or triple
stitching will be sewn between the points.
Press and to select for single
stitching or for triple stitching, and then
press (OK key).
X A screen for selecting the next operation
appears.
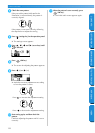
8
Select , and then press (OK key).
• If you make a mistake while specifying a
point, press the C key to erase the last point
specified.
X A screen for specifying the next point
appears.
9
Repeat steps
6
through
8
to specify each
point.
Up to 99 points can be entered.
0
After all points in the pattern have been
specified, select in the screen that appears
in step 8
, and then press (OK key).
1
2
3


Find Your Products By Category
- Lawn and Garden
- Computer Equipment
- TV and Video
- Laundry Appliance
- Kitchen Appliance
- Car Audio and Video
- Automotive
- Photography
- Fitness & Sports
- Personal Care
- Communications
- Home Audio
- Portable Media
- Musical Instruments & Equipment
- Baby
- Household Appliance
- Cell Phone
- Marine Equipment
- Outdoor Cooking
- Power Tools
- Video Game
Please Login
