
0
Owner's of the Brother Sewing Machine PC-420PRW gave it a score of 0 out of 5. Here's how the scores stacked up:


Sewing Stretch Fabrics and Elastic Tape 91
GETTING READYCONTENTS SEWING BASICS UTILITY STITCHES APPENDIX INDEX
Sewing Stretch Fabrics and Elastic Tape
Stretch fabrics can be sewn and elastic tape can be attached.
Observe the corresponding precautions when performing each of the following stitching operations.
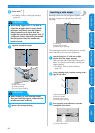
Stretch stitching
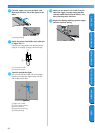
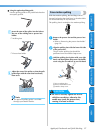
1
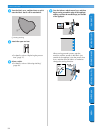
Attach zigzag foot “J”.
• For details, refer to “Replacing the presser
foot” (page 37).
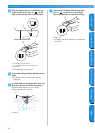
2
Select stitch
5
.
• For details, refer to “Selecting stitching”
(page 68).
3
Sew the fabric without stretching it.
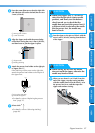
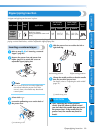
Elastic attaching
When elastic tape is attached to the cuff or waist of a
piece of clothing, the finished dimensions will be that
of the stretched elastic tape. Therefore, it is necessary
that a suitable length of the elastic tape be used.
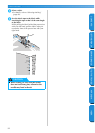
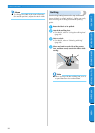
1
Pin the elastic tape to the wrong side of the
fabric.
Pin the elastic tape to the fabric at a few points
to make sure that the tape is uniformly
positioned on the fabric.
1 Elastic tape
2 Pin
2
Attach zigzag foot “J”.
• For details, refer to “Replacing the presser
foot” (page 37).
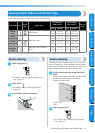
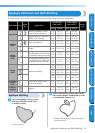
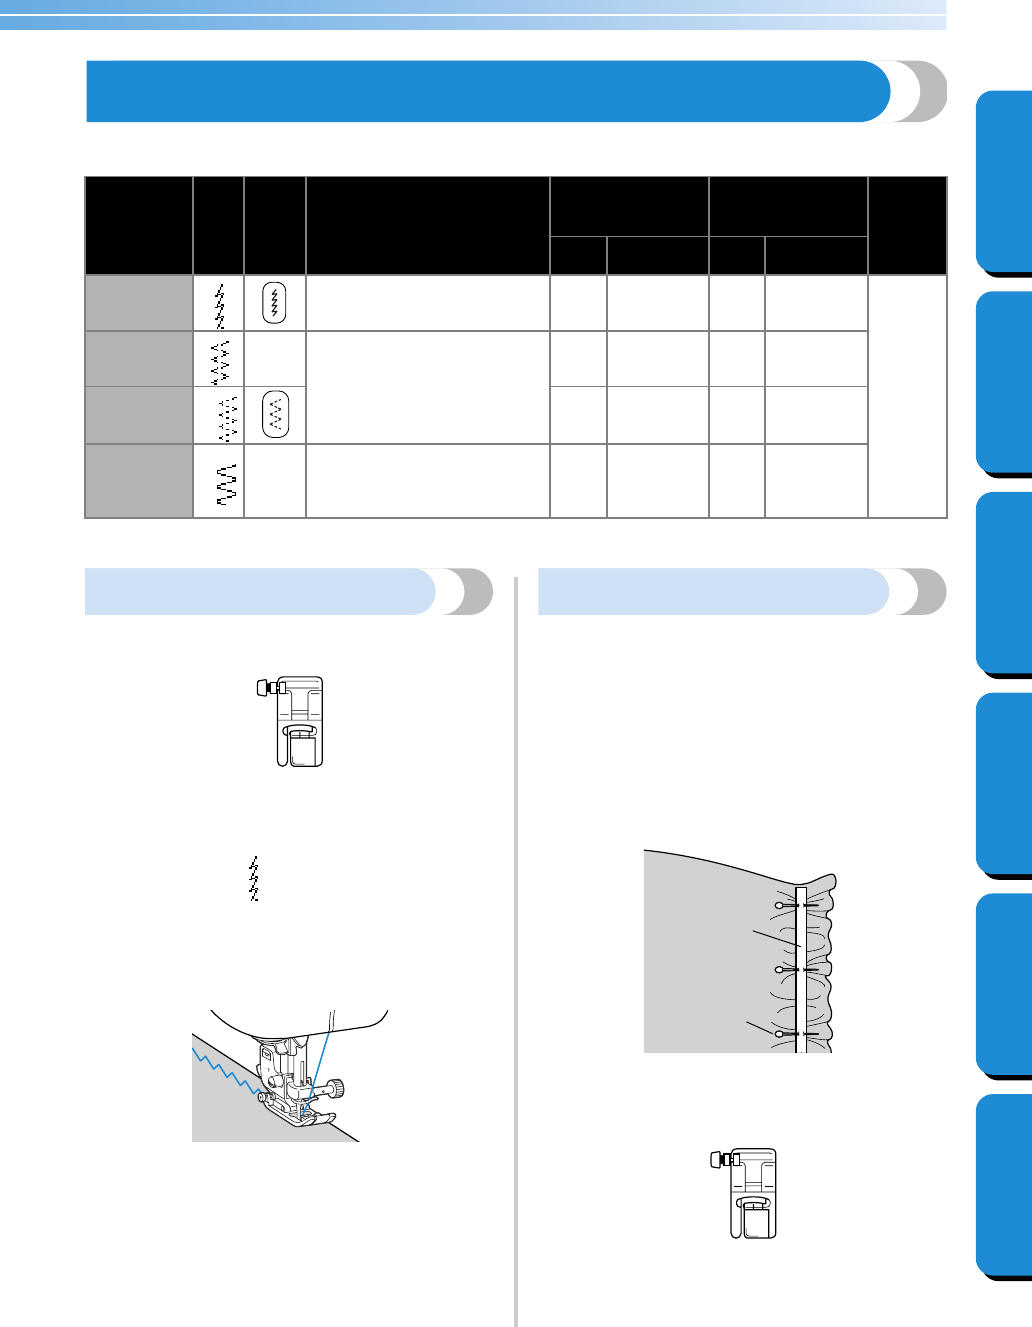
Stitch Name
Pattern
Stitch
Key
Application
Stitch Width
[mm (inch.)]
Stitch Length
[mm (inch.)]
Presser
Foot
Auto Manual Auto Manual
Stretch
stitch
5
Stretch fabrics
1.0
(1/16)
1.0–3.0
(1/16–1/8)
2.5
(3/32)
1.0–4.0
(1/16–3/16)
J
2-point
zigzag stitch
9
–
Attaching elastic
5.0
(3/16)
1.5–7.0
(1/16–1/4)
1.0
(1/16)
0.2–4.0
(1/64–3/16)
3-point
zigzag stitch
10
5.0
(3/16)
1.5–7.0
(1/16–1/4)
1.0
(1/16)
0.2–4.0
(1/64–3/16)
Elastic-
attaching
stitch
28
–
Attaching elastic to stretch
fabrics
4.0
(3/16)
0.0–7.0
(0–1/4)
1.0
(1/16)
0.2–4.0
(1/64–3/16)
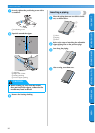
J
1
2
J


Find Your Products By Category
- Lawn and Garden
- Computer Equipment
- TV and Video
- Laundry Appliance
- Kitchen Appliance
- Car Audio and Video
- Automotive
- Photography
- Fitness & Sports
- Personal Care
- Communications
- Home Audio
- Portable Media
- Musical Instruments & Equipment
- Baby
- Household Appliance
- Cell Phone
- Marine Equipment
- Outdoor Cooking
- Power Tools
- Video Game
Please Login
