
0
Owner's of the Brother Sewing Machine PC-420PRW gave it a score of 0 out of 5. Here's how the scores stacked up:

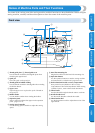
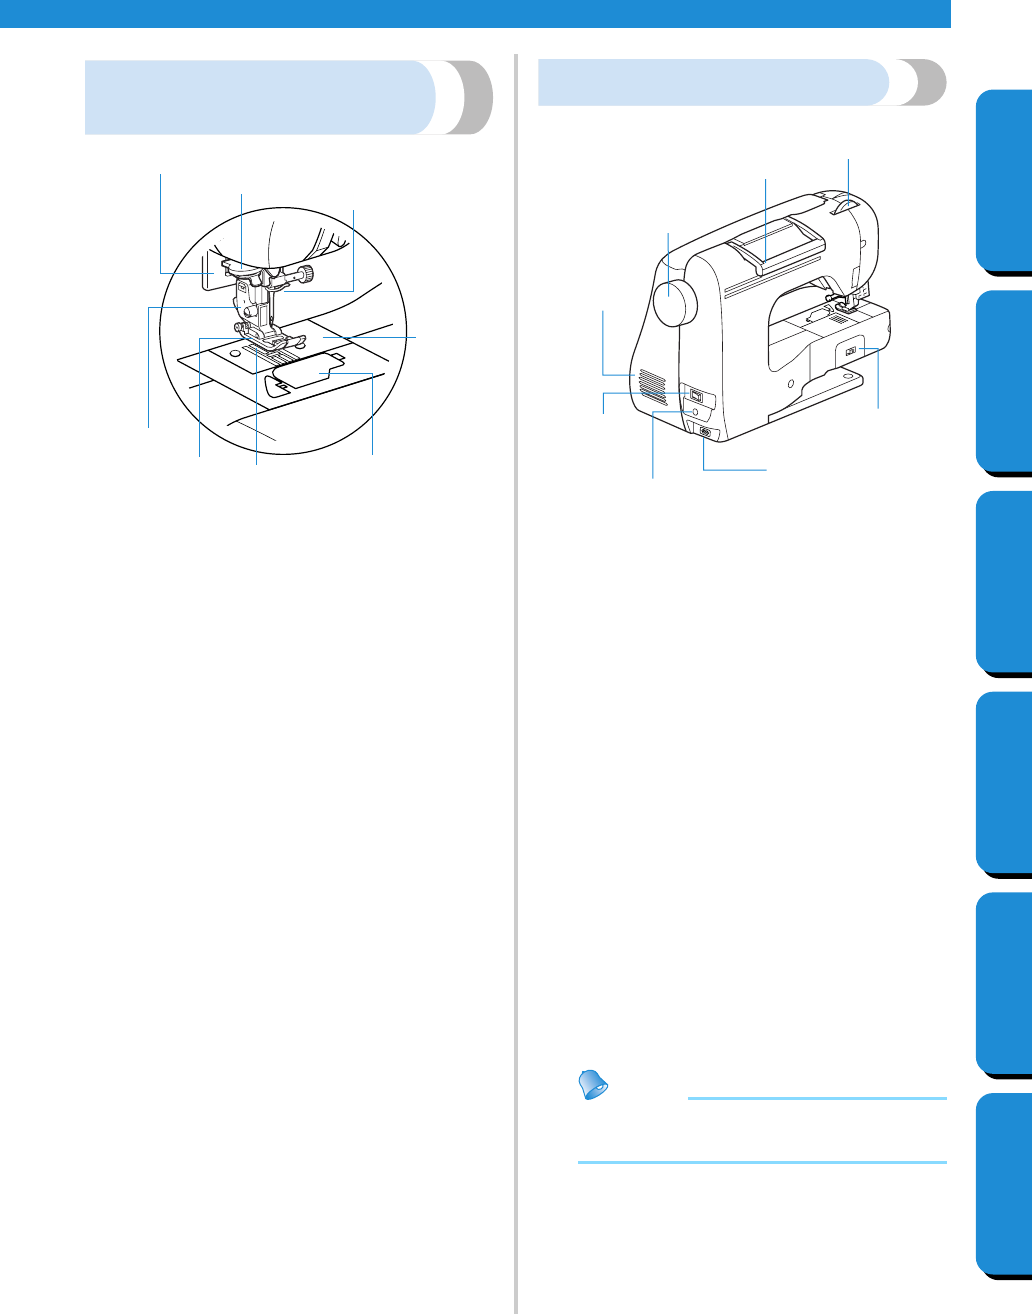
———————————————————————————————————————— Names of Machine Parts and Their Functions
Cover C
GETTING READYCONTENTS SEWING BASICS UTILITY STITCHES APPENDIX INDEX
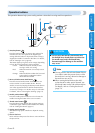
Needle and presser foot
section
1 Buttonhole lever
Lower the buttonhole lever when sewing buttonholes
and bar tacks.
2 Thread guide discs
Pass the thread through the thread guide discs when
using the needle threader to thread the needle.
3 Needle bar thread hook
Pass the upper thread through the needle bar thread
hook.
4 Needle plate
The needle plate is marked with guides for sewing
straight seams.
5 Bobbin cover/shuttle
Remove the bobbin cover, and then insert the bobbin
into the shuttle.
6 Feed dogs
The feed dogs feed the fabric in the sewing direction.
7 Presser foot
The presser foot applies pressure consistently on the
fabric as the sewing takes place. Attach the appropriate
presser foot for the selected stitching.
8 Presser foot holder
The presser foot is installed onto the presser foot holder.
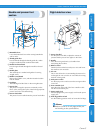
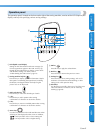
Right-side/rear view
1 Presser foot dial
Use the presser foot dial to adjust the amount of
pressure that the presser foot applies to the fabric.
2 Handle
Carry the sewing machine by its handle when
transporting the machine.
3 Balance wheel
Turn the balance wheel toward you to raise and lower
the needle to sew one stitch.
4 Air vent
The air vent allows the air surrounding the motor to be
exchanged. Do not cover the air vent while the sewing
machine is being used.
5 Main power switch
Use the main power switch to turn the sewing machine
on and off.
6 Foot controller jack
Insert the plug on the end of the foot controller cable
into the foot controller jack.
7 Power supply jack
Insert the plug on the power supply cord into the power
supply jack.
8 Feed dog position switch
Use the feed dog position switch to lower the feed dogs.
Memo
● Refer to Cover B, D or E pages while you
are learning to use your machine.
1
2
3
4
5
6
7
8
2
3
5
6
4
7
8
1


Find Your Products By Category
- Lawn and Garden
- Computer Equipment
- TV and Video
- Laundry Appliance
- Kitchen Appliance
- Car Audio and Video
- Automotive
- Photography
- Fitness & Sports
- Personal Care
- Communications
- Home Audio
- Portable Media
- Musical Instruments & Equipment
- Baby
- Household Appliance
- Cell Phone
- Marine Equipment
- Outdoor Cooking
- Power Tools
- Video Game
Please Login
