
0
Owner's of the Brother Sewing Machine PC-420PRW gave it a score of 0 out of 5. Here's how the scores stacked up:

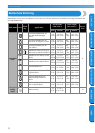
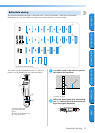


Buttonhole Stitching 83
GETTING READYCONTENTS SEWING BASICS UTILITY STITCHES APPENDIX INDEX
3
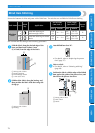
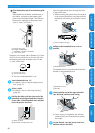
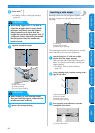
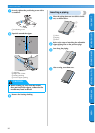
Place the button into button-sewing foot “M”.
1 Button
• When attaching four-hole buttons, first sew
the two holes closest to you. Then, slide the
button so that the needle goes into the two
holes toward the rear of the sewing machine,
and then sew them in the same way.
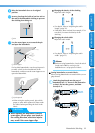
4
Select stitch
55
.
• For details, refer to “Selecting stitching”
(page 68).
• Leave automatic thread-cutting set to .
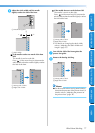
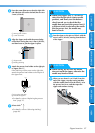
5
Turn the balance wheel toward you to check
that the needle correctly goes into the two
holes of the button.
Adjust the stitch width to the distance between
the button holes.
6
Start sewing.
X The sewing machine automatically stops
after sewing reinforcement stitches.
• If additional strength is needed to secure the
button, perform the button-sewing operation
twice.
• Do not press the thread cutter button.
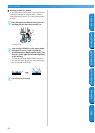
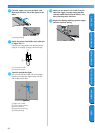
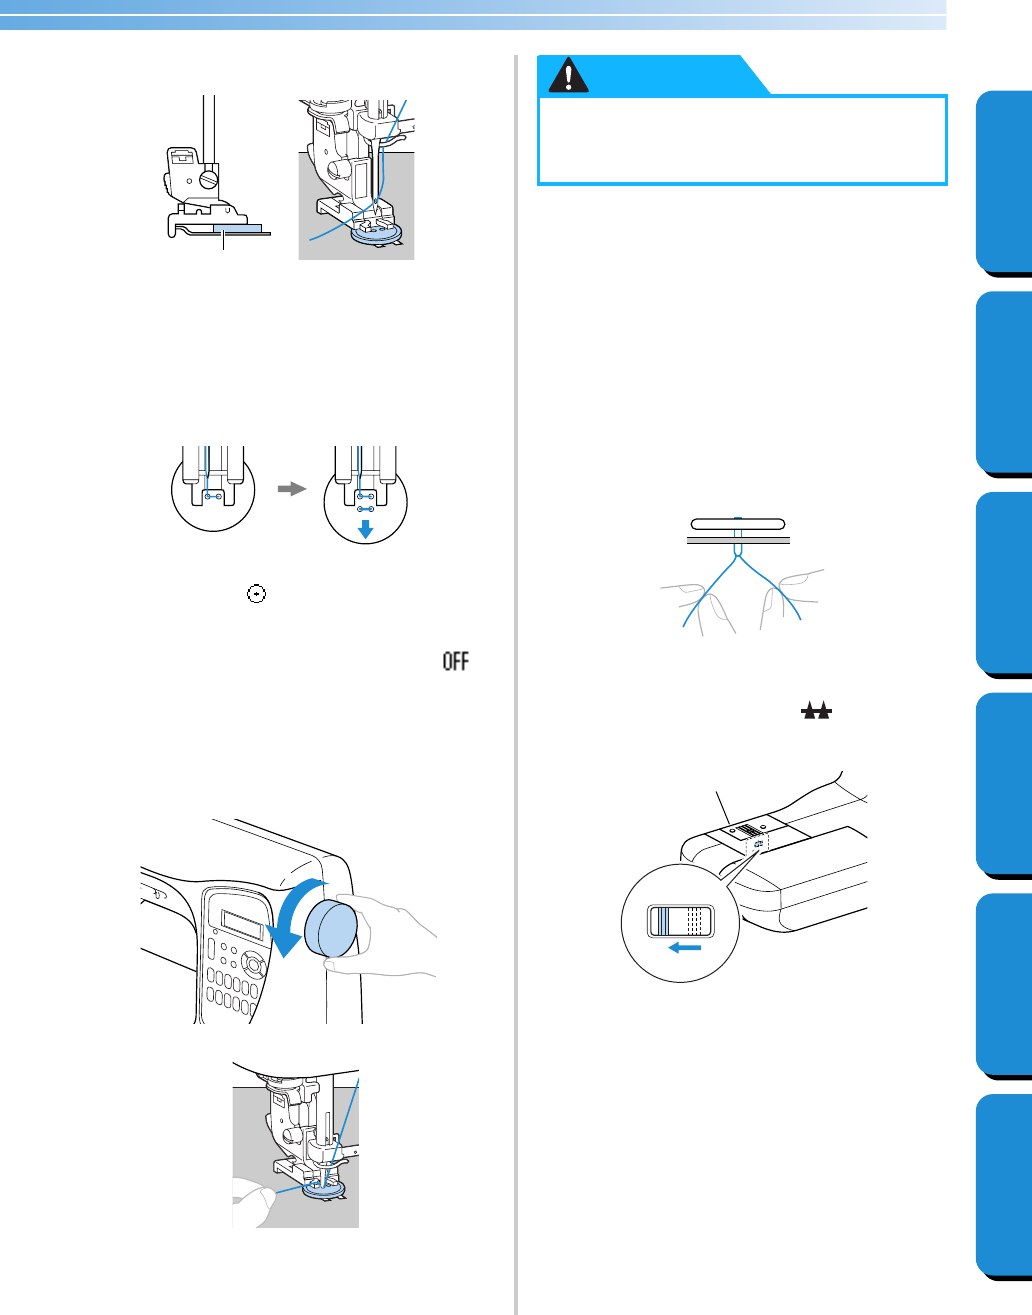
7
Pull the upper thread at the end of the
stitching to the wrong side of the fabric, and
then tie it with the bobbin thread.
Use scissors to cut the upper thread and the
bobbin thread at the beginning of the stitching.
8
When you are finished attaching the button,
slide the drop feed lever to (to the left as
seen from the front of the machine) to raise
the feed dogs.
1 Back side
1
●
When sewing, be sure that the needle
does not touch the button, otherwise the
needle may bend or break.
CAUTION
1


Find Your Products By Category
- Lawn and Garden
- Computer Equipment
- TV and Video
- Laundry Appliance
- Kitchen Appliance
- Car Audio and Video
- Automotive
- Photography
- Fitness & Sports
- Personal Care
- Communications
- Home Audio
- Portable Media
- Musical Instruments & Equipment
- Baby
- Household Appliance
- Cell Phone
- Marine Equipment
- Outdoor Cooking
- Power Tools
- Video Game
Please Login
